Newsletter Archive
![]()
UP IN SMOKE
SUPER BOWL SUNDAY EDITION
Dear Up in Smoke Subscriber,
If you’re a football fan, you know that Super Bowl XLIV will be played on February 7 in Miami, Florida, my adopted hometown. (For you trivia buffs, this is the tenth year Miami has hosted the annual contest between the best teams in the NFL.)
Just for grins, I went to the website this morning of an online ticket broker to determine what it would cost to trade a spot in front of the television for one of the 75,540 seats in Dolphin Stadium. Well, folks, the answer stunned me: The cheapest seat, in the uppermost section of the end zone, would set you back $2202; the most expensive, $386,750, would clinch a catered luxury suite for you and 31 of your best friends.
Neither option, incidentally, includes parking. Spaces range in price from $202 to $1190.
My internet fact-finding mission confirmed this: You can throw an incredible party for family and friends for a fraction of the cost of a Super Bowl ticket…or even a parking space! Heck, you can even buy a new grill and still come out ahead. Host a Super Bowl Party at home and you’ll have a better view of the action (accompanied by those all-important instant replays and edgy commercials), ringside seats for the halftime show, and way better food than the stadium vendors will be hawking.
In my opinion, the best food, the only proper Bowl food should come hot off the grill. It should be fast, sizzling, hearty, and finger friendly.
The menu at my house will have an international twist this year in deference to my new book, Planet Barbecue (Workman, May, 2010) and the fact that the game is aired in 175 foreign countries.
Below are my all-new recipes for reinterpretations of Super Bowl stalwarts like wings, brats, and “sliders.” They’ll score big at your party, too.
Oops. My snow-beleaguered, mostly Ohio-based assistant, Nancy Loseke, reminded me your grill could be buried under three feet of white stuff. (As I write, the current temperature in Miami is an almost unprecedented 36 degrees. Back when I lived in New England, we used to ask a simple question to separate the men from the boys: When it snows, what do you shovel first, the path to your car or the path to your grill?) If bad weather has shut your outdoor operation down, don’t worry. These recipes can be adapted to the kitchen. For others, check out Indoor Grilling (Workman, 2004).
PERI PERI CHICKEN WINGS
No Super Bowl party is complete without a bowl of a different sort—filled with smoky, fiery wings. Here’s how they do it in South Africa. I think you’ll like how the lemon-chile-herb sauce electrifies the flavor.
Though I like to serve the wings hot off the grill, you can make them before game time, then reheat in a 325 degree F oven.
Source: Planet Barbecue (Workman, 2010)
Method: Indirect grilling
Serves: 4 as an appetizer
Advance preparation: 6 to 24 hours for marinating the wings
For the marinade:
1/2 cup South African peri peri sauce (see Note below), Brazilian piri piri sauce,
Crystal, Tabasco, or other hot sauce
6 cloves garlic, peeled
1 small onion, peeled and quartered
One 3-inch piece of fresh ginger, peeled and cut into 1/4-inch slices
1/4 cup chopped fresh cilantro
1/4 cup vegetable oil
1/4 cup fresh lemon juice
2 teaspoons coarse salt (kosher or sea)
1 teaspoon freshly ground black pepper
3 pounds large chicken wings
For the glaze:
1/2 stick (4 tablespoons) salted butter
3 tablespoons chopped fresh cilantro
2 cloves garlic, minced
3 tablespoon peri peri sauce or one of the other hot sauces mentioned above
2 tablespoons fresh lemon juice
1. Make the marinade: If using a blender, add the peri peri/hot sauce, garlic, onion, ginger, cilantro, oil, lemon juice, salt, and pepper and puree until smooth. If using a food processor, puree the solid ingredients first, then work in the liquids. Transfer to a large nonreactive bowl, roasting pan, or large resealable plastic bag.
2. Cut the chicken wings in half, discarding the wing tips. Stir them into the marinade and marinate for at least 6 hours, or as long as overnight—the longer, the richer the flavor—stirring every few hours.
3. Make the glaze: Melt the butter in a saucepan. Add the cilantro and garlic and cook over medium-high heat until sizzling and aromatic, about 2 minutes. (Do not let the garlic brown.) Stir in the peri peri sauce (or other hot sauce) and lemon juice and simmer for 2 minutes.
4. Set up your grill for indirect grilling and preheat to medium (350 degrees F). Brush and oil the grill grate. Arrange the chicken wings on the grate and indirect grill until crisp and golden brown on the outside and cooked through, 30 to 40 minutes. Make a small cut in the thickest part of one of the wings: There should be no traces of red or pink at the bone.
5. Transfer the wings to a platter and pour the hot glaze over them. Toss to mix and serve at once.
NOTE: Nando’s Peri-Peri Sauce can be purchased online from www.southafricanfoodshop.com.
CURRYWURST: BRATWURST WITH CURRY SAUCE
Currywurst is German comfort food, invented (or so the story goes) when a resourceful street vendor dropped a box containing ketchup and curry powder. What matters on Super Bowl Sunday is that currywurst gives you a whole new approach to bratwurst.
Source: Planet Barbecue by Steven Raichlen (Workman, 2010)
Method: Direct grilling
Serves: 4
1 tablespoon vegetable oil, plus 1 tablespoon for grilling the brats
1/4 cup white onion, minced as fine as sand
1 teaspoon mustard seed or mustard powder
1 tablespoon curry powder
1/2 teaspoon black pepper
1/4 teaspoon freshly grated nutmeg
1/4 teaspoon anise seed
1 cup ketchup (preferably Heinz)
8 bratwurst
1. Make the sauce: Heat 1 tablespoon oil in medium saucepan. Add the onion and mustard seed and cook over medium heat until the onion just begins to brown. Stir in the curry powder, pepper, nutmeg, and anise seed and cook until fragrant, about 1 minute. Stir in the ketchup and gently simmer the sauce until thick and richly flavored, 3 to 5 minutes. The sauce can be made several days ahead of time, but it should be warmed for serving.
2. Set up your grill for direct grilling and preheat to medium. Brush and oil the grill grate.
3. Arrange the brats on the grill and grill until the casings are crusty and brown on all sides, 8 to 10 minutes per side, 16 to 20 minutes in all, turning frequently with tongs and moving to dodge hot spots or flare-ups.
4. Transfer the brats to a cutting board. Cut each brat crosswise into 1/4-inch thick slices. Mound the slices in a shallow serving bowl and spoon the curried tomato sauce on top. Serve with toothpicks.
“KOBE” BEEF SLIDERS
Despite the recent burger frenzy, the slider (or slyder, as it was originally called) originated in the 1920s at the White Castle chain in Wichita, Kansas, in 1921. To make upscale, off-the-charts sliders, use wagyu beef (the cattle breed that gives the Japanese Kobe)—available via mail order from www.allenbrothers.com. Or use regular ground beef, but make sure you have a fat content of at least 15 percent.
Source: Planet Barbecue by Steven Raichlen (Workman, 2010)
Method: Direct grilling
Serves: 8 as an appetizer
For the caramelized shallots:
2 tablespoons unsalted butter
1 tablespoon extra-virgin olive oil (or more butter)
1 pound shallots, peeled and thinly sliced crosswise
Coarse salt (kosher or sea) and freshly ground black pepper
For the sliders:
1-1/2 pounds ground waygu or Kobe-style beef, or substitute ground chuck (ideally
between 15 to 20 percent fat)
12 small brioche rolls or Parker House rolls
2 tablespoons unsalted butter, melted
Your choice of condiments, including pickles, mustard, ketchup, etc.
1. Make the caramelized shallots: Melt the butter with the oil in a heavy saucepan. Add the shallots. Cook over medium heat until the shallots have been reduced to a thick, sweet paste. This will take about 15 minutes and you’ll have to stir often. Lower the heat as needed to keep the shallots from burning. (Add a tablespoon or two of water as needed.) Add salt and pepper to taste. The shallots can be caramelized several hours or even a day ahead.
2. Make the burgers: Divide the beef into 12 portions. Lightly wet your hands and mold each into a square patty about 2 inches square and 1/2 inch thick. Arrange on a plate and chill, covered with plastic wrap, until you’re ready to grill the sliders.
3. Set up your grill for direct grilling and preheat to high. Brush and oil the grill grate.
4. Generously salt and pepper the sliders and arrange on the grate. Grill until cooked to taste, 2-1/2 to 3 minutes per side for medium, turning with a spatula. Meanwhile, brush the cut sides of the rolls with melted butter and grill them until golden brown. (Watch closely.)
5. To assemble the sliders, place a spoonful of caramelized shallots on the bottom section of each bun. Top with a slider and the top bun half, and serve at once with condiments.
Yours in righteous grilling,
Steven Raichlen, Grill Master and Editor-in-Chief
Nancy Loseke, Features Editor


![]()
UP IN SMOKE
A BARBECUER’S GIFT GUIDE
Dear Up in Smoke Subscriber,
In early black and white movies, a common technique for illustrating the passage of time was to film calendar pages flipping from January through December, whipped by an unseen wind. Folks, that’s how fast this year has gone for us. There was a huge push the first quarter to finish writing my next book, Planet Barbecue, followed by weeks of recipe testing. (The book will be released in May.)
There was the stretch after Memorial Day when I mostly lived out of my suitcase, traveling on a 20-city book tour. In June, I taped the second season of my French TV show, Le Maitre du Grill, and spent a terrific few days in Colorado, first at the Broadmoor in Colorado Springs teaching two back-to-back sessions of Barbecue University®, then at the Aspen Food & Wine Festival. Happily, July was all about family.
Come fall, I repacked my bags and headed to southern Arizona to film Season 3 of Primal Grill — the show launches on PBS in May. If you’d like a Primal Grill fix before the grilling season starts in earnest next spring, add Volumes 1 and newly-released Volume 2 of the DVD to your culinary library.
It’s time once again to compile Up in Smoke’s annual Barbecuer’s Gift Guide! Whew.
I’ve invited Nancy Loseke, assistant extraordinaire and Features Editor of Up in Smoke, to help me in this endeavor. Ladies first.
Nancy: I’m going to start at the top. In my estimation, one of the most cherished gifts you can give or receive is a once-in-a-lifetime experience: Barbecue University® is that, and more. It’s simply the ultimate gift for devotees of live-fire cooking. The mountain-side setting is stunning, and the hospitality at the Broadmoor resort is world-class, and the accommodations are as well. Be sure to inquire about the availability of “The Cottages” if you make plans to attend Barbecue University®.
The excitement is palpable at the evening welcome buffet…and wait until you get your first look at the collection of smokers and grills. Husbands and wives, fathers and sons, mothers and daughters, buddies and BFFs—they’ve all come for three days of smoke, fire, and camaraderie. Well… that and the food! Students learn to prepare at least eight recipes in each class — the icons, like brisket and ribs and the cutting-edge dishes like grilled pizza and Catalan cream — to be sampled at a belt-busting lunch. Afternoons and evenings are free for golf, hiking, spa treatments, and enjoying all that the Broadmoor and Colorado Springs have to offer. For gift certificates or more information, call the Broadmoor at 1-800-634-7711.

Steven: Grilling and roasting with wood has become a new passion for me. So imagine my pleasure when I got to “test drive” several new wood-burning grills and ovens last month while shooting Primal Grill.
Consider the Aztec Home Grill. Clad in stainless steel and built like an Iowa-Class battleship, this front-loading grill features heavy-duty cast iron grates and a full 3 inches of firebrick. Options—and I always like options—include a sturdy motorized rotisserie unit, side-mounted shelves, and a stainless steel grill grate cover.
Another wood-burner that took me by storm was the terracotta Beehive Oven sold by Al Fresco Imports. As the name implies, the oven resembles a large beehive on an iron stand—and when it comes to wood-roasting veggies or duck (not to mention baking pizzas), the flavor is out of this world. A beehive oven is both Old World and trendy: the cool factor is off the charts.

Nancy: One coal we wouldn’t mind finding in the stockings this year is charcoal — especially natural lump charcoal. You know, the stuff made from real trees, not petroleum binders and coal dust. One brand we really liked on the set of Primal Grill III comes from Honduras, where it’s made from oak (you can see the shape of the original tree branches). Order it from allnaturalcharcoal.com, and while you’re at it, pick up a bundle of fatwood firestarters. Once you grill over this stuff, you’ll want to throw stones at commonplace briquettes.
Speaking of charcoal, Weber has just introduced two oversized charcoal grills, the 26-inch One Touch Gold kettle grill and a 22-1/2 inch Smokey Mountain Cooker. (Both are sold through Amazon.com.) If you’ve ever struggled to grill or smoke a really big turkey or brisket, these bad boys are your ticket.
In any case, if you’re attracted to the oldest cooking method known to man, put in a request for South American grilling legend Francis Mallman’s new book, Seven Fires: Grilling the Argentine Way (Artisan, 2009). Outrageous techniques including grilling on sticks, on fire- heated iron plaques, and in the embers; stunning photographs; irresistible recipes (try the salt-crusted chicken); this sizzling book has them all.
Steven: Food, of course, is always a practical gift. On my “A” list of purveyors are Allen Brothers—there’s a recipe for their long-bone Kurobuta pork chops below; Legal Sea Foods for impeccable seafood; and Melissa’s World Variety Produce for top-notch specialty produce.
Nancy: Little did we know when we met Albert Carver at Barbecue University® this past summer that we were making the acquaintance of one of the country’s top “lobstahmen.” Albert’s company, LobsterSelect.com, provides live Maine lobsters to some of the country’s best restaurants. The quartet of crustaceans I received at Albert’s generous insistence—each about 1-1/2 pounds—arrived in pristine condition and made for some of the best eating of the summer. Gift certificates are available, too.
Steven: Lobster makes a great splurge meal, but good gear will serve you for years. This month we’re offering a 10 percent discount on select grilling accessories in my Best of Barbecue collection at (see ad below). I’m especially proud of our new grilling tools with pakkawood handles—stainless steel skewers, spatulas, grill brushes and basting brushes, not to mention the toughest steak knives out there. In the seasoning department, there’s our new Spicy Gourmet Grilling Ketchup, Balsamic-Ginger and Sesame-Teriyaki spray glazes, and our fiery Fajita and Gaucho rubs.
Nancy: One of my new favorite gadgets from Best of Barbecue is the Chile Pepper Grill Rack and the clever tool for coring jalapenos that accompanies it. A “must” for Super Bowl parties.
Steven: Homemade gifts are always appreciated—especially in an unsettled economy. Make up and package your own rub or barbecue sauce along with recipes or suggested uses. Below you’ll find one of our favorites—a rib rub from Steven’s new book, Planet Barbecue. For other ideas, check out Sauces, Rubs, and Marinades (Workman, 2000), or go to the December 2006 issue of Up in Smoke.
We wish you a wonderful holiday season and a happy and prosperous New Year.
GRILLED LONG-BONE PORK CHOPS WITH ONION JAM
Pork chops go upscale in this recipe hot off the set at Primal Grill III. Note: you can also make it with veal chops.
Method: Direct grilling
Advance preparation: 1 hour to make the onion jam.
Serves 4.
For the onions:
1 pound small torpedo onions, cipollinis, pearl onions, or shallots
1 tablespoon extra virgin olive oil (optional)
Coarse salt (kosher or sea) and freshly ground black pepper
2 cups dry red wine
1 cup balsamic vinegar, or to taste
1 cup honey, or to taste
1/4 cup (4 tablespoons, 1/2 stick) unsalted butter
4 gorgeous pork chops, preferably long-bone, Heritage-breed (each 1 to 1-1/4 inches thick and 10 to 12 ounces)
1 tablespoon chopped flat-leaf parsley
1. Set up your grill for direct grilling and preheat to high.
2. Peel the onions, leaving most of the stem end intact. (The helps hold the onion together during cooking.) If you’re feeling ambitious, toss the onions with olive oil, salt, and pepper. Grill the onions until well browned on all sides, 3 to 5 minutes per side. For ease in turning, you may wish to thread the onions on bamboo skewers before grilling. You can grill the onions at a previous grill session. This step is optional, but it will give the sauce a rich smoke flavor.
3. Place the onions (grilled or raw if you’ve omitted the previous step) in a large deep saucepan and add the wine, vinegar, honey, and 3 tablespoons butter. Bring to a boil over high heat. Boil the sauce until the onions are tender and the wine, vinegar, and honey have cooked down to a syrupy glaze, 6 to 10 minutes. If the onions become soft before the sauce has thickened, transfer them to a plate with a slotted spoon, and continue boiling the sauce until thick and syrupy, then add them back. Correct the seasoning, adding salt to taste and vinegar or honey as needed. The onions should be a little sweet, a little sour, and very flavorful. The onions can be cooked several hours—or even a day ahead—and reheated just before serving. Immediately before serving, stir in the remaining 1 tablespoon butter. You should wind up with about 1-1/4 cups.
4. Set up your grill for direct grilling and preheat to high. Have one grill zone on medium. Brush and oil the grill grate.
5. Generously season the chops on both sides with salt and pepper.
6. Arrange the chops on the grill grate running on the diagonal to the bars of the grate. Grill until nicely browned on the outside and cooked through, 4 to 6 minutes per side, depending on the desired degree of doneness. Give each chop a quarter turn half way through on each side to lay on a crosshatch of grill marks. If the chops brown too much on the hot zone, move them to the medium zone.
7. Transfer the chops to a platter or plates. Reheat the onion mixture. Spoon it over the chops and sprinkle with the parsley if using. Serve at once.
CARIBBEAN RIB RUB
Source: Steven Raichlen
Makes about 1 cup; can be multiplied as desired
1/2 cup coarse salt (kosher or sea)
1/4 cup light brown sugar
1 tablespoon freshly ground black pepper
1 tablespoon granulated garlic
2 teaspoons onion powder
2 teaspoons ground allspice
2 teaspoons chili powder
1 teaspoon ground cinnamon
Combine all ingredients in a small bowl and whisk to mix, breaking up any lumps. Excellent when rubbed on pork ribs or even chicken before grilling or smoking.
Yours in righteous grilling,
Steven Raichlen, Grill Master and Editor-in-Chief
Nancy Loseke, Features Editor
![]()
UP IN SMOKE
SIX REASONS TO GIVE THANKS
Dear Up In Smoke Subscriber,
Let’s face it: A lot of bad turkey gets served every Thanksgiving. The problem has less to do with human error—well, usually—than with avian anatomy. The simple fact is that the delicate white meat of the turkey breast cooks faster than the dark rich meat of the legs and thighs. So if you cook a turkey to a safe temperature (165 degrees F), the breast is almost guaranteed to dry out.
What’s a griller to do?
Well, there’s a simple solution to this problem. Actually, there are six. Brine the bird. Cure it. Inject it. Chop it. Smoke it. Grill it. All will give you every grillmaster’s dream holiday bird—moist, tender, smoky and bursting with flavor. Here’s a quick rundown on each:
Brine it. Brining is the process of marinating the bird overnight in a saline solution (saltwater). By the process of osmosis (remember your high school chemistry?), some of the brine is drawn into the turkey, making the meat both succulent and flavorful. Brining works great for both whole turkeys and turkey breasts. Below you’ll find an orange-brown sugar brined turkey adapted from my forthcoming book, Planet Barbecue.
Cure it. Curing is a bit like brining, only you use a dry rub instead of a liquid. The salt draws some of water out of the turkey. You might think this would make the bird dry. It doesn’t. What it does do is give you a rich-textured bird and bold flavor. Here’s a prime example: the turkey pastrami in The Barbecue! Bible (page 270 if you own the original edition, and page 286 if you own the anniversary edition). Or if you’re in a hurry, check out our Best of Barbecue Pastrami on the Grill Kit.
Inject it. You could think of the process of injecting a turkey as marinating from the inside out. Using a kitchen syringe (it looks an oversize hypodermic needle), you inject a mixture of broth, melted butter and other seasonings (such as cognac or Madeira wine) deep into the breast and thigh meat. This keeps the bird moist—even after prolonged cooking on a grill or in a smoker. Not to mention the mad scientist machismo of brandishing the injector. (Raichlen’s Rule #6—never underestimate the importance of looking cool when you set out to grill. Rule #7? Never put coarse ground spices in an injector sauce—they’ll clog the needle.) In the recipes section below, you’ll find a recipe for a Madeira turkey injection adapted from How to Grill.
Chop it. This refers to the “divide and conquer” approach to grilling. To keep turkey moist on the grill, start with thin slices of breast or thigh (as they do in Israel) or even finely chopped turkey (as they do in Russia and the Republic of Georgia) to make a sort of grilled skinless turkey sausage called shashlik. Small pieces of meat cook more quickly than large, so you can cook them through without drying them out. Below you’ll find a recipe for Russian ground turkey kebabs—again adapted from the new Planet Barbecue.
Smoke it: One of the best ways to keep turkey moist on the grill is to smoke it in the style of the American South. The closed cooking environment holds in not only the smoke, but the moisture. The low to moderate heat used in smoking cooks the bird without drying it out. By the way, smoked turkey is an excellent dish to make in the Weber 22-1/2-inch Smokey Mountain smoker or the Big Green Egg.
Grill it: When working with turkey steaks (cut from the breast) or chopped or ground turkey, the best method is direct grilling. Work over a medium-high to high heat to sear the meat on the outside while keeping it moist in the center. Target temperature for doneness is 165 degrees F. To add flavor, spray the bird as it grills with olive oil, wine, or a spray marinade, such as our new Best of Barbecue Balsamic Ginger Spray Marinade.
The turkey is a bird near and dear to the American heart, for it’s indigenous to the New World—domesticated by the Aztecs long before long before the arrival of the Spanish. Benjamin Franklin regarded turkey so highly, he wanted to name it—not the eagle—our national bird. So how did a fowl with such deep American roots come to be called turkey? In the 16th century, many luxury consumer products came from or through Turkey. Thus, labeling this New World fowl a “Turkie bird” helped lend it cachet and commercial acceptance. Here’s a new twist on an American Thanksgiving icon, and brining and smoking virtually guarantee your bird will be moist. Note: I prefer indirect grilling to smoking for turkey as smoking tends to make the skin leathery, while indirect grilling keeps it crisp. But I give both options below.
Looking for a unique recipe to spice up the holiday season? Try the Ultimate Grilling Contest winning recipe:
London Broil “Pizza” Grilled with Roasted Garlic, Kalamata Olives, and Fontina by Judy Armstrong of Prairieville, LA
Serves: 6
1 1/2 pounds London broil (top round steak), approximately 1 1/2 inches thick, butterflied and flattened
1/4 cup olive oil
1/4 cup balsamic vinegar
5 cloves garlic, minced
1/4 cup fresh thyme leaves
1 teaspoon sea salt
1/2 teaspoon freshly ground black pepper
2 tablespoons mashed roasted garlic
1 tablespoon Dijon mustard
1 1/2 cups shredded Fontina cheese
5 plum tomatoes, thinly sliced crosswise
1/2 cup seeded, halved Kalamata olives
1/2 cup jarred or frozen sliced artichoke bottoms, thawed
1 cup fresh grated Romano cheese, plus extra for serving
1/4 cup diced red bell pepper
1/2 teaspoon crushed red pepper flakes, plus extra for serving
1/4 cup thinly sliced fresh basil leaves, plus extra for serving
1. Place the butterflied London broil in a food-safe plastic bag. Add the olive oil, balsamic vinegar, minced garlic, and thyme. Close the bag and massage the marinade into the steak and refrigerate for 1 to 6 hours. Remove from the refrigerator and bring to room temperature.
2. Preheat the grill to medium.
3. Remove the steak from the plastic bag, and discard the marinade. Pat the steak dry with a clean towel. Season with the salt and pepper. Open up the steak to its full measure and place it on the grill, cut side (inside of the butterfly) down. Grill for 1 minute to sear. Turn the steak and smear the cut side all over with the roasted garlic and Dijon mustard. Layer the Fontina, tomatoes, olives, artichoke bottoms, 1 cup Romano cheese, the red bell pepper, 1/2 teaspoon crushed red pepper flakes, and the basil over the steak. Continue to cook until the cheese is melted, 7 to 8 minutes more.
4. Remove the steak to a cutting board, let sit for 3 minutes, then cut it into 4 pieces. Garnish with additional fresh basil and Romano cheese and serve.
SMOKE-ROASTED TURKEY
WITH ORANGE-BROWN SUGAR BRINE
Serves 12.
Adapted from Planet Barbecue (Workman, May 2010)
For the brine:
1-1/2 cups kosher salt
1-1/2 cups dark brown sugar
1 gallon cool water
4 bay leaves
4 strips orange zest (removed with a vegetable peeler), plus the juice of the orange
4 whole cloves
1 medium onion, thinly sliced
1 cinnamon stick
1 tablespoon black peppercorns
1 turkey (about 12 pounds)
4 tablespoons salted butter, melted, for basting
Madeira Gravy (recipe follows)
You’ll also need: trussing string; about 5 cups soaked, drained hardwood chips or chunks
1) Make the brine: Place the salt, sugar, and 1 quart water in a large stockpot or clean bucket. Whisk in the remaining water. Add bay leaves, orange zest strips, cloves, onion, cinnamon, black peppercorns, and orange juice to the brine.
2) Wash the turkey inside and out with cold running water, then place it in the bucket with the brine. Place a heavy weight, like a saucepan or a resealable plastic bag filled with ice, on top to keep it submerged. Brine-cure the turkey in the refrigerator for 24 hours.
3) Drain the turkey well and blot dry with paper towels. For a more professional-looking presentation, truss the bird with butcher’s string.
Indirect grill method (best done on a charcoal grill): Set up your grill for indirect grilling and preheat to medium-low (300 degrees F). Place the turkey, breast side up, on the grate over the drip pan. Add 3/4 cups wood chips or chunks to each mound of coals. Smoke-roast the turkey until dark golden brown and cooked through; the internal temperature of the meat in the deepest part of the thigh should be 165 degrees F. Here’s another test for doneness—pierce the thigh with a slender skewer: the juices should run clear. This will take 3 to 3-1/2 hours, and you’ll need to replenish the charcoal every hour. Add another batch of wood chips after the first and second hours, but not the third. Start basting the turkey with melted butter after 2-1/2 hours and baste every 20 or 30 minutes.
Smoker method: Set up your smoker according to the manufacturer’s instructions and preheat to 275 degrees F. Drain the turkey well and blot dry. For a more professional- looking presentation, truss the bird with butcher’s string. Place the turkey in the smoker, breast side up. Smoke the turkey until dark golden brown and cooked through; the internal temperature of the meat in the deepest part of the thigh should be 165 degrees F. Here’s another test for doneness—pierce the side of the thigh with a slender skewer: the juices should run clear. Depending on your smoker and the temperature outside, this will take 4 to 6 hours. Start basting the turkey with butter after 3 hours and baste every 30 minutes.
Transfer the turkey to a platter and remove the trussing string. Let rest for 20 to 25 minutes, loosely tented with foil. Make the Madeira Gravy (recipe follows) and serve at once.
MADEIRA GRAVY
Makes 3 cups.
Turkey is only as good as the gravy you spoon over it. This may be about the best gravy you’ve ever tasted, enriched as it is with smoked turkey drippings, Madeira, and for an unexpected touch, a splash of coffee. Note: the easiest way to defat the turkey drippings is to use a fat separating gravy boat (the sort whose spout comes off the bottom). Fat rises, so when you pour off the drippings, the fat stays in the gravy boat.
2 cups turkey drippings
1 to 2 cups chicken or turkey stock
3 tablespoons butter
3 tablespoons flour
1/4 cup Madeira wine
1/4 cup coffee
1/4 cup heavy cream
Coarse salt (kosher or sea) and freshly ground black pepper to taste
1) Strain the turkey drippings into a fat separating gravy boat. Wait a few minutes, then pour the drippings into a large measuring cup, stopping when the fat starts to come out. Add enough chicken stock to obtain 3 cups.
2) Melt the butter in a heavy saucepan. Stir in the flour and cook until a dark golden brown, 3 to 4 minutes.
3) Remove the pan from the heat and gradually whisk in the Madeira, coffee, cream, and the turkey drippings with stock. Return the pan to the heat and bring to a boil, whisking steadily. Simmer the sauce over medium heat until richly flavored and reduced to about 3 cups, 6 to 10 minutes. Correct the seasoning, adding salt and pepper to taste.
MADEIRA INJECTOR SAUCE
Below is a basic injector sauce I’ve adapted from How to Grill (Workman, 2001). It can be used on a raw turkey in place of a brine to keep turkey moist and succulent. Make the sauce as directed and keep it warm (not hot). Draw the injector sauce into the syringe, and inject into the drumsticks, thighs, and the plumpest parts of the breast. Then indirect grill, smoke, or rotisserie the bird. (Discard any leftover injector sauce.)
1/2 cup chicken broth (preferably homemade)
3 tablespoons butter
3 tablespoons Madeira wine
2 teaspoons lemon juice
1/2 teaspoon salt, or more to taste
1/2 teaspoon ground poultry seasoning
1/4 teaspoon finely ground black pepper
Combine all the ingredients in a nonreactive saucepan and cook just until the butter melts. Taste for seasoning, adding more salt if necessary. Keep warm until ready to use, then transfer to the kitchen syringe.
GROUND TURKEY SHASHLIK WITH ONION AND DILL
Advance preparation: For the best results, make the meatball mixture 2 to 4 hours ahead and refrigerate until firm.
Adapted from Planet Barbecue (Workman, May 2010)
Makes 8 5-inch kebabs, enough to serve 4.
1-1/2 pounds boneless skinless turkey thighs or breasts
2 ounces turkey or chicken fat, chilled, or 2 strips of bacon, cut into 1/2 inch pieces and chilled
1 clove garlic, minced
1-1/2 teaspoons coarse salt (kosher or sea), or to taste
1/2 teaspoon freshly ground black pepper, or to taste
1/4 cup rough-chopped sweet onion
3 tablespoons chopped fresh dill
Vegetable oil for oiling your hands.
You’ll also need: flat metal or bamboo skewers
1) Cut the turkey and turkey fat into 1-inch pieces and place in a food processor fitted with a metal blade. Add the garlic, salt, and pepper. Grind the chicken to a coarse puree, running the processor in short bursts. Add the onion and dill and run the processor in short bursts just to mix. If using butter, work it in now, running the processor in short bursts.
2) Transfer the mixture to a bowl and refrigerate for 1 to 2 hours. This step is optional, but it will make the turkey kebabs easier to form.
3) Mold the turkey mixture onto flat skewers to make kebabs that are about 1-inch in diameter and 5 inches long. You should get 8 kebabs. It helps to lightly oil your hands before molding. Place the kebabs on a plate lined with plastic wrap, cover with more plastic wrap, and refrigerate (ideally, 1 to 2 hours more, but you can grill them right away) until you’re ready to grill.
4) Set up your grill for direct grilling and preheat to high. Brush and generously oil the grill grate. Note: If using grateless grilling, there’s no need to oil the grate.
5) Grill the turkey kebabs until golden brown on the outside and cooked through, 4 to 6 minutes per side (8 to 12 minutes in all). Carefully slide the turkey kebabs off the skewers onto a platter or plates. Serve at once.
Yours in righteous grilling,
Steven Raichlen, Grill Master and Editor-in-Chief
Nancy Loseke, Features Editor
![]()
UP IN SMOKE
GRILLING WITH WOOD
Dear Up In Smoke Subscriber,
When it comes to fuels for grilling, nothing beats the flavor of wood. Cooking over a wood fire brings out the primal caveman in all of us. The flickering flames are as fascinating and soothing to stare at as the delicate smoke flavor is to taste.
A wood fire is at once deeply personal (remember your first campfire?) and archetypal. It is certainly universal and timeless. “Something happens to a man when he sits before a fire,” wrote the 20th century conservationist, Sigurd F. Olson. “Around a fire, men feel that the whole world is their campsite, and all men are partners of the trail.”
Ironically, his 1956 remarks roughly coincided with big changes in outdoor cookery, at least in this country. Wood, the primordial fuel of choice since Homo erectus first walked the earth, was supplanted in suburban backyards by natural gas, propane, and stamped charcoal briquettes. In most wilderness areas, even Olson’s beloved “campfire” now depends on a canister of petroleum-based substances for its heat instead of scavenged wood.
Elsewhere on Planet Barbecue—in places as far-flung as Tuscany, Germany, and South America—wood cooking fires still burn, tended by people who take great pride in grilling the way it’s been done for a million years or more. And more and more Americans are rediscovering a method of grilling that was commonplace when our country was founded, and practiced as recently as fifty years ago.
Lately, I’ve been inundated with e-mailed questions about hardwoods. One writer was motivated by a literal windfall: Patrick N. lost a crabapple tree in a storm and wondered if he could use the wood for grilling. (Absolutely.) Another, Brandon J., asked me if I had ever tried a hard thorny wood called madrone and went so far as to send me a sample. (The smoke smelled suspiciously similar to a substance that Bill Clinton tried but didn’t inhale.)
Still other grillmasters simply seek bigger challenges. And grilling over wood—an inherently mercurial heat source rife with hot spots and cool spots—is definitely more challenging than charcoal or gas.
The original wood-burning “grill” was a campfire—still the preferred “device” used throughout South America. Argentina’s asado, Brazil’s fogo de chao, and Colombia’s hogao are all variations on a theme of meats (and sometimes whole animals) impaled on sticks and roasted in front of a campfire. The heat control is as primitive as it is effective. You move the stick—and meat—closer to or further away from the fire.
One South American grillmaster has raised the art of gaucho campfire cooking to an art—Francis Mallmann, owner of the restaurants Garzon in Uruguay, of Patagonia Sur in Buenos Aires, and of Francis Mallmann 1884 in Mendoza, and author of the stunning new book, Seven Fires: Grilling the Argentine Way (Artisan, 2009). For me, this is the simply one of the best books about live fire cooking ever published, and it belongs on every serious griller’s bookshelf. (Find it in bookstores or at www.amazon.com.)
Among Mallmann’s seven fires are asado (bonfire roasting), parilla (grilling on a gridiron over embers), champa (grilling on a fire heated metal plate), etc. The coolest (actually hottest) of all is the infiernillo ( “little hell,” literally)—a sort of open outdoor oven with fires above and below the food—inspired by primitive stone ovens made by Incan Indians.
If an open fire is not an option, there are several grills on the market that can accommodate wood fires or are built specifically for them. Among them are the Grillery (www.thegrillery.com), a high-end grill equipped with a flywheel for raising or lowering the grill grate patterned on the grills popular in Argentina—you’ve probably seen it on “Primal Grill with Steven Raichlen.” Two other cool wood-burning grills are the CB940X made by Char-Broil and the stainless steel Aztec Home Grill, both equipped with a hatch in the front for adding the logs. On the set of Primal Grill, Season 2, we built a roaring fire in the larger-than-life Weber Ranch kettle grill, and when it burned down, roasted sweet potatoes directly in the embers. For the recipe, go to www.primalgrill.org.
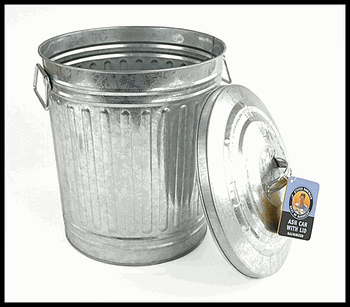
In terms of other equipment, you’ll need long fire-resistant leather gloves or welder’s gloves; a long-handled grill hoe, garden hoe, or shovel; long-handled tongs; a steel fireplace poker; a lidded metal ash can and scoop; and of course, a fully-charged fire extinguisher.
You’ll also need a grill grate to cook on unless you plan on impaling your food on sharpened green sticks or on a telescoping fork. You can improvise a grate using, for example, an old oven rack, or use a cast iron Tuscan-style grill with legs to hold it over the fire. Position it over a bed of embers at your cook site or in your fireplace.
Here are some additional tips for grilling over wood:
- Always use seasoned (dried) hardwoods like oak, alder, ash, beech, hickory, maple, pecan, birch, walnut, mesquite, or fruitwoods. Other options include olive wood, wine barrel staves and grapevine clippings. (For obvious reasons, all are popular in northern California’s Napa Valley.) Softwoods like pine and fir produce a resinous smoke that generally spoils the flavor of food.
- If you’ve ever built a campfire or started a fire in a fireplace, you know the drill: Create a teepee of small twigs atop a pile of kindling (wood chips, newspaper, or other tinder), adding larger pieces of wood as the fire catches. What you may not realize is that you can start a wood fire in a chimney starter. Fill the chimney with hardwood chunks and light as you would charcoal. Or light some charcoal in a chimney starter, and use it as an under-fire to bring the wood to flame.
- Allow plenty of time—up to 45 minutes—for the fire to mature and burn down to embers. Then, with a shovel or long-handled grill hoe rake the glowing orange embers underneath the grill grate. As with charcoal, the deeper the pile, the higher the heat. A common misconception among wood fire beginners is that cooking should be done over leaping flames. Note: The exception to the rule is Germany’s Spiessbraten, an onion-stuffed pork shoulder roast spit-roasted directly in the flames of a smoky beech wood fire. But in most wood fire-obsessed cultures, embers are the goal. Replenish as needed. In South America, log fires are built in a special wrought-iron rack called a leñero brasero; embers are harvested when they fall through the spaces at the bottom. A regular fireplace grate makes a reasonable substitute.
- Wood burns faster than either lump charcoal or charcoal briquettes. Be prepared to replenish the embers every 20 to 30 minutes.
- Open fires, i.e., those built on the ground or in a pit, are disallowed in many areas. Check with local authorities prior to your grilling session. An indoor wood-burning fireplace is also an option if you want to experiment with grilling over wood.
- Of course, you’ll build your wood fire well away from anything flammable, including buildings, trees, spreading tree roots, dry vegetation, etc. Be sure to take note of wind direction and velocity. You don’t need to be a Californian to know that wind-driven fires can have tragic consequences.
- Keep a fire extinguisher, water hose, a bucket of salt, or a pile of dirt and a shovel nearby to keep the fire from spreading out of control. (Hey, things can happen fast.) Extinguish the fire completely once you are finished with it. If you’ve built the fire in a charcoal grill, starve it of oxygen by putting the lid on and closing all the vents. If the fire has been built in an open area, douse it thoroughly with water (watch out for rising steam) or smother it with dirt. Tend the site for at least 30 more minutes to ensure the fire is completely out. (Remember “Smoky the Bear” and his public service words of wisdom?)
- Incidentally—because I know some of you will ask—while wood fires send more particulate matter into the atmosphere than cleaner-burning propane, the Environmental Protection Agency does not currently endorse one over the other. Scientists say a fallen tree will release carbon dioxide into the air whether it is burned or left to rot, and over its lifetime, will have efficiently converted CO2 to oxygen. Unlike natural gas, wood is also a renewable resource. If possible, find a local source for grilling and smoking woods.
Finally, here are a couple of recipes to inspire your wood-fired grilling:
A PERFECT STEAK WITH CHIMICHURRI

Source: Seven Fires: Grilling the Argentine Way by Francis Mallmann (Artisan, 2009)
Method: Grilling over embers
Serves: 1
Advance Preparation: Make chimichurri sauce 1 day ahead
One 1-pound boneless rib-eye steak per person, about 1-1/4 to 1-1/2 inches thick
Coarse salt
Chimichurri (recipe follows)
Make a wood fire about an hour before you plan to serve the meat. Shovel or rake a 2- to 3-inch bed of coals under the grill grate. (The grate should be 3 to 4 inches above the coals.) You want a medium-high temperature, a “2 Mississippi” fire. Salt the steak(s) to taste. Brush and oil the grill grate.
Place the meat on the grill. Rotate the meat after 5 minutes. Cook for 4 more minutes, then turn the steak(s) over with tongs and cook for approximately 7 more minutes, or until medium-rare, rotating after 4 minutes to achieve a handsome crosshatch of grill marks. Transfer the steak(s) to a platter and let rest for 3 minutes. Serve with chimichurri.
CHIMICHURRI
Makes about 2 cups
1 cup water
1 tablespoon coarse salt
1 head garlic, separated into cloves and peeled
1 cup packed fresh flat-leaf parsley leaves
1 cup fresh oregano leaves
2 teaspoons crushed red pepper flakes
1/4 cup red wine vinegar
1/2 cup good quality extra-virgin olive oil
Bring the water to a boil in a small saucepan. Add the salt and stir until it dissolves. Remove from the heat and let cool.
Mince the garlic very fine and put in a medium bowl. Mince the parsley and oregano and add to the garlic along with the pepper flakes. Whisk in the vinegar, then the olive oil. Whisk in the salt-water mixture. Transfer to a jar with a tight-fitting lid and refrigerate for at least 1 day. Chimichurri will keep, refrigerated, for 2 to 3 weeks.
GRILLED PROVOLETA
Recipe adapted from Steven Raichlen’s Indoor Grilling (Workman, 2004)
Method: Grilling over embers
Serves: 4 to 6 as an appetizer
When Argentineans say grilled cheese, they really mean it—thick slabs of provoleta (a firm cow’s milk cheese similar to provolone) seared on the gridiron until they are melted and lightly browned. It’s mandatory fare at any Argentine steakhouse and a great recipe to do in the fireplace.
2 thick slices of provoleta or Provolone (each about 3/4 to 1 inch thick and 8 ounces)
1 tablespoon good-quality extra-virgin olive oil
2 teaspoons cracked black peppercorns
2 teaspoons dried oregano, or 3 tablespoons fresh oregano leaves, preferably small ones
Crusty bread for serving
Brush each slice of cheese on both sides with the cracked black peppercorns and oregano.
Prepare a wood fire. Rake red hot embers under the gridiron and preheat it for 3 to 5 minutes. You want a hot, 2 to 3 Mississippi fire. When ready to cook, brush and oil the gridiron. Place the cheese slices on the hot grate. The cheese will be done after cooking 2 to 4 minutes per side. Take care to remove it before the cheese melts on the embers.
Yours in righteous grilling,
Steven Raichlen, Grill Master and Editor-in-Chief
Nancy Loseke, Features Editor
![]()
UP IN SMOKE
PAELLA TO MAKE A VALENCIAN WEEPDear Up in Smoke Subscriber:
Quick—name the most famous grilled dish in Spain: Chuleta (Spain’s famous salt grilled rib steak)? Rodobalo (garlic grilled turbot from the Basque country)? Both are popular, but Spain’s most famous grilled masterpiece is…paella.
That’s right, paella (pronounced pah-YAY-a), for the true, the traditional, the authentic way to cook paella is outdoors over a campfire. Alas, mediocre versions of this glorious rice dish—cooked in a wide, flat-bottom pan also known as a paella—abound, and even in its native Valencia, the wood-grilled version is hard to find.
First, some background.
Authentic Spanish paella, which was first seen during the 18th century near the coastal city of Valencia, has much in common with American barbecue. It was poor peoples’ food, cooked over open fires (usually fueled by orangewood or vine clippings or even pine cones) for the midday meal by laborers for laborers, and nearly always by men. Cooks developed their own “secret” recipes, and jealously guarded them. Competitions sprang up. Today, a “Paella King” is crowned each year in the northwest region of Galicia.
Originally, the key ingredients for a traditional paella Valenciana were scavenged close by—the most important being the unique strains of short-grain rice known as arroz bomba or Calaspara that grew (and still grow) in the lagoon-like marshes on Spain’s eastern seaboard. Local produce, like bell peppers and runner beans, added color, while saffron and pimentón (smoked Spanish paprika) ramped up the flavor. Protein came in whatever form people could scrounge it: vegetables, garden snails, rabbit, or the occasional duck—shrimp, clams, etc., if they lived by the sea.
So what constitutes an authentic paella today? It depends on where you are and the occasion. Even in Valencia, paella has multiple personalities: “Paella de mariscos” comes crammed with shellfish or other seafood; “paella mixta” would include seafood and meat such as chicken, pork, chorizo, sausage, or all of the above. There’s even a green paella from Alicante flavored with rabbit, snails and green herbs that mimics the first paellas.
But before you get started, there are a few things you should know about a dish that should be in every grillmaster’s repertory:
1. A paella pan is the preferred equipment for cooking this classic dish. It not only looks cool, but it encourages the rice to caramelize into a golden brown layer (called soccorat) on the bottom of the pan—the best part, some people say, of a well-made paella. You can find one at Spanish grocery stores or cookware shops. We recently added a stainless steel paella pan to the Best of Barbecue line. In a pinch, you can substitute a large frying pan with a heatproof handle.
2. If possible, do cook the paella the traditional way—over a wood campfire. If you go this route (and I encourage you to), a Tuscan grill will help you position the pan securely and stably over the fire. Cooking paella over a campfire can get mighty hot: you might also wish to invest in a grill hoe. The long handle makes it ideal for stirring the paella.
3. Like risotto or pilaf, a good paella lives or dies by the rice. The traditional bomba or Calaspara rice are available at Spanish markets or from Internet purveyors such as www.tienda.com or www.thespanishtable.com. Italian Arborio rice can also be used, although you may need to use slightly more liquid to keep the rice from drying out.
4. Chorizo is a Spanish sausage made with large chunks of cured pork. (It differs from Mexican or Spanish Caribbean chorizo, although the latter can be used in a pinch.) Piquillo peppers are small, bright red peppers with a sweet aromatic flavor—they’re almost always sold bottled or canned. Pimentón is a Spanish smoked paprika. Again, these are available at Spanish grocery stores, or via www.tienda.com or www.thespanishtable.com. Red bell peppers and regular paprika make credible substitutes.
5. Paella is a festive and abundant dish that is meant to be shared communally. Give each diner a wooden spoon for scooping out a portion. Accompany the paella with grilled garlic bread (How to Grill, page 418) for sopping up the juices, a green salad, and either White Sangria (see Ribs, page 268) or a crisp, dry Spanish wine such as an Albariño or Txakoli.
Click here for a traditional recipe for Paella on the Grill, from Planet Barbecue.
For a vegetarian adaptation of Paella on the Grill, click here.
Yours in righteous grilling,
Steven Raichlen, Grill Master and Editor-in-Chief
Nancy Loseke, Features Editor
![]() UP IN SMOKE:
UP IN SMOKE:
A GUIDE TO BUDGET GRILLINGDear Up in Smoke Subscriber:
Plug the words “budget” and “grilling” into any Internet search engine, and you’re likely to churn up headlines referring to squirmy appearances before Congress by high-profile auto and banking executives who are being “grilled” about their roles in undermining our economy, and who probably feel like their hindquarters are figuratively “in the fire”.
Like most Americans, I miss the good ol’ days when TARP meant something you threw over the woodpile and Bernie Madoff wasn’t a household name.
But you don’t need a degree in finance to know that all of us are watching our money more closely.
Here’s some rare good news from the economic front: tough meat and tough times don’t have to go together.
Less expensive cuts of meat respond beautifully to the low, slow heat of smoking and barbecuing. They can even be the stars of your live fire show. Below is my strategy for saving money on food in these challenging economic circumstances:
RAICHLEN’S TIPS FOR BARBECUE ON A BUDGET
Stay home and fire up your grill. Simply commit to grilling at home and automatically save money—especially when entertaining a group. Grilling at home is also healthier for you and more fun.
True barbecue is the original budget food. The low, slow heat of the smoker breaks down tough meat, making cheap cuts like brisket and ribs supernaturally flavorful.
Save leftover charcoal for next time. If there is charcoal left over, cover the grill, closing the top and bottom vents to put out the fire. Use the remaining charcoal for a future grill session.
Inexpensive steaks, like skirt and hanger, have a lot more flavor than costlier cuts, like filet mignon. Tenderize these cuts by flash-grilling over high heat and slicing the meat thinly across the grain.
Choose the less-expensive dark meat pieces of a chicken. Dark meat, like thighs and legs, is better marbled, richer tasting, and less prone to drying out when exposed to the high, dry heat of the fire than pricier white meat pieces. Ninety-five percent of the world’s grillmasters prefer dark meat.
Expensive sirloin and Kobe beef may have the prestige, but chuck delivers more flavor when making a burger. Choose chuck that is at least 15 percent fat and your burgers will be juicier. And try making an inside-out cheeseburger by grating sharp cheddar, pepper Jack, parmesan, or blue cheese directly into ground meat; it melts as the meat cooks, producing an exceptionally moist burger.
Grill dark oily fish like sardines, Spanish mackerel, or kingfish as an inexpensive seafood alternative. The omega-3 fatty fish oils are great for your health and keep the fish from drying out on the grill.
Smoke whole briskets, beef clods (shoulders), pork shoulders, whole turkeys, and racks of spareribs. This yields more meat for the money, much less work is required, and everyone loves the primal pleasure of cutting into a communal-size roast.
Cook the whole meal on the grill. Appetizer, main course, vegetable side dishes, and even dessert can be cooked using live fire. It saves on fuel, clean-up, and wear and tear in the kitchen. And don’t forget, if something tastes good baked, fried, or sautéed, it probably tastes better grilled!
Farmer’s market buys on summer vegetables can be the centerpiece of a grilled meal. In some Asian countries, meat is often served as a precious condiment to vegetables and salads.
BOURBON-BRINED SMOKED TURKEY LEGS
Penny for pound, it’s hard to find more flavor than turkey legs and thighs.
Source: Recipe adapted from BBQ USA by Steven Raichlen (Workman, 2003)
Method: Smoking
Serves: 4
Advance Preparation: 3 to 4 hours for brining the turkey
For the brine:
1/2 cup bourbon (or substitute apple juice)
1/2 cup coarse salt (kosher or sea)
1/2 cup firmly packed brown sugar
1 lemon, sliced into 1/4-inch slices
4 cloves garlic, peeled and gently crushed
2 tablespoons black peppercorns
2 tablespoons mustard seeds
2 tablespoons coriander seeds
8 cups water
For the turkey:
8 turkey legs
2 tablespoons of extra-virgin olive oil
Spicy Apple Barbecue Sauce or your favorite barbecue sauce for serving
You’ll also need: 1 large container or a jumbo or 2 large resealable plastic bags for brining. About 2 cups wood chips or chunks (apple or pecan work great), soaked for 1 hour in water to cover, then drained.
1) Make the brine: Combine the bourbon, salt, brown sugar, lemon, garlic, peppercorns, and mustard and coriander seeds in a large nonreactive bowl with 8 cups of water and whisk until the salt and brown sugar dissolve.
2) Rinse the turkey legs under cold running water. Put the legs into the resealable plastic bag(s) and add the brine. Refrigerate for 6 to 8 hours, turning periodically to distribute the brine evenly. For faster brining, perforate the meat with a fork or marinade turbocharger.
3) Set up the grill for indirect grilling and preheat to medium, about 325 degrees F. If using a gas grill, place half the wood chips or chunks in the smoker box or in a smoker pouch and run the grill on high until you see smoke. Then lower the heat. If using a charcoal grill, place a large drip pan in the center, preheat it to medium, then toss half of the wood chips or chunks on the coals.
4) When ready to cook, drain the brine off the turkey legs and blot dry with paper towels. Discard the brine. Lightly rub the turkey legs with the olive oil. Arrange the turkey legs in the center of the hot grate, over the drip pan and away from the heat. Cover the grill and indirect grill the turkey until cooked through, 1 to 1-1/2 hours, adding charcoal as needed To test for doneness, use an instant-read meat thermometer; the internal temperature should be about 165 degrees F.
Note: you can also smoke the turkey in a smoker. You’ll need 2-1/2 to 3 hours at 250 degrees.
Serve with your favorite barbecue sauce.
SMOKED BRATS
The brat-fry (act of grilling bratwurst) is a Wisconsin institution. Unfortunately, the high fat content makes brats prone to spectacular flare-ups. You can avoid the pyrotechnics and add incredible flavor to this iconic American barbecue staple by smoke-roasting using indirect grilling. Another advantage is that the skin is less likely to split and lose those great juices to the fire. You can find some of my favorite brat variations, such as wine-simmered brats and Philly cheese brats, on page 353 of BBQ USA.
8 uncooked brats
For serving (optional):
Sauerkraut
Dark, spicy, German-style mustard
Grilled onions
Dill pickle slices
Hard rolls, hearth rolls, or Kaiser rolls
You’ll also need: 2 cups wood chips or chunks (preferably apple or hickory)
1) Set up the grill for indirect grilling and preheat to medium (350 degrees F).
If using a gas grill, place all the wood chips or chunks in a smoker box or smoker pouch and run the grill on high until you see smoke, then reduce the heat to medium. If using a charcoal grill, place a large drip pan in the center, preheat the grill to medium, then toss 2 cups of the wood chips or chunks on the coals.
2) When ready to cook, place the brats in the center of the hot grate, over the drip pan and away from the heat, and cover the grill. Grill the brats until crusty and browned on the outside and cooked thoroughly, 30 to 40 minutes. (To check for doneness, insert an instant-read meat thermometer in one end—it should read 160 degrees F.)
3) Serve the brats immediately with the accompaniments suggested above…and of course, plenty of cold beer.
Yours in righteous grilling,
Steven Raichlen, Grill Master and Editor-in-Chief
Nancy Loseke, Features Editor
![]() UP IN SMOKE
UP IN SMOKE
MAKE NO MIS-STEAK FOR FATHER’S DAYDear Up in Smoke Subscriber:
Here’s something I bet you didn’t know: Red roses are the “official” flower of Father’s Day. But—no surprise here—it’s red meat that most red-blooded American dads are thinking of on their special day (and most other days, too).
The perfectly cooked steak is one of the holy grails of barbecue—often pursued, rarely achieved. It challenges even the most experienced grillers. I can explain the fundamentals to you in a few minutes. It takes years to master all the fine points.
There are, of course, a lot of steaks to choose from, but in this issue of Up in Smoke, I want to focus on one particular steak, the ultimate steak for many grillmasters and my personal favorite—the mighty T-bone.
The T-bone is actually two steaks in one: a New York strip (a.k.a. Kansas City strip if you happen to come from Missouri), and a portion of filet mignon, both connected by a T-shaped bone. So why a T-bone? Remember, meat on the bone is always the most flavorful—the reason, by the way, so many people love ribs.
Closely related to the T-bone is the Porterhouse, which also consists of a piece of New York strip and a piece of filet mignon. So what’s the difference? The T-bone is cut closer to the center of the steer, which means a tastier New York strip, but a smaller piece of filet mignon. The Porterhouse is cut closer to the hindquarters of the steer, which means a large piece of filet mignon, but a slightly tougher New York strip. Seeing as I prefer the robust, beefy flavor of the New York strip to the mild—some would say bland—taste of the filet mignon, the T-bone is the cut for me. If you happen to prefer filet mignon, go for the Porterhouse. Whichever steak you select, make sure it’s cut thick (1-1/4 to 1-1/2 inches).
So who else likes T-bones besides American dads? Grillmasters in Tuscany, where the T-bone reaches its apotheosis in the form of Italy’s legendary bistecca alla fiorentina, also known as Florentine-style steak (see The Barbecue! Bible for a recipe).
In Argentina, a country obsessed by beef, this noble cut goes by the name of bife de costilla. And of course, there’s the Texas T-bone, sometimes called a “cowboy steak”—rubbed with chili powder and spices and seared over a wood fire.
But when it comes to seasoning a great T-bone, there, the consensus ends. Italians usually use only salt for seasoning and a high-quality extra-virgin olive oil as a sauce. Argentineans serve their T-bones with a vibrant and addictive condiment called chimichurri. (There’s a great recipe in The Barbecue! Bible). Brazilians use veritable fistfuls of sea salt so coarse you could use it for salting your sidewalk or driveway. In the U.S., upscale steakhouses often anoint their grilled steaks with butter or melted beef fat.
This summer, you may have seen me grilling T-bones my new favorite way—directly on the embers “caveman style”. The micro-charring gives you an unbelievable crust and smoke flavor, and of course, the process looks extreme and ultra-cool. Click here for the recipe.
THE SIX MYTHS ABOUT GRILLING STEAK
There are a number of myths concerning how to cook a great steak, T-bones included. So let’s separate fact from fiction.
Myth number 1: Let the steak warm to room temperature before grilling.
Bad idea. Meat at room temperature is a formula for microbial disaster. Steakhouse pros keep their meats ice-cold and bacteria-free until the moment of grilling.
Myth number 2: Salt toughens steak, so don’t salt before grilling.
On the contrary, a generous dusting of salt (kosher or coarse sea salt) and cracked black peppercorns right before grilling gives you the rich flavor and savory crust characteristic of a great steakhouse steak. So, season the steak right before it goes on the grill. Do not, however, season a steak hours ahead, or the salt will draw out the juices and make the steak dry.
Myth number 3: A barbecue fork is the proper tool for turning a steak.
Wrong. The only purpose served by puncturing a steak with a fork is to drain out the flavorful juices. Always use tongs when turning a steak.
Myth number 4: Turn the steaks often.
False. Most of the world’s meat masters turn the steaks only once. Why? This helps achieve a better crust.
Myth number 5: The best way to check for doneness is to cut into the steak with a knife.
False. Again, the last thing you want to do is cut or puncture the meat. For the same reason, don’t buy Dad one of those temperature-reading barbecue forks for Father’s Day. The best way to check for doneness is to use the poke test: Press the thickest part of the steak with your finger. When the meat is rare, it will feel soft and squishy. When medium-rare, the meat will feel semi-soft and yielding. When medium, the meat will yield just a little, while when well-done, the meat will feel hard and springy. Not that we advocate serving a T-bone (or any steak) well done.
For really thick steaks, use an instant-read meat thermometer. Insert it through the side of the steak to get an accurate reading. Here are the temperatures that define varying degrees of doneness:
Rare: 125 degrees F
Medium-rare: 145 degrees F
Medium: 160 degrees F
Well-done: 180 degrees F
Myth number 6: Steak tastes best sizzling hot off the grill.
False: A steak hot off the grill will be dry and leathery. You should let all grilled steaks (all meats, actually) “rest” for a couple of minutes on a hot platter. This allows the meat to “relax,” redistributing the juices. The result: a more tender, succulent steak
So get out there, Dad (or moms and kids who want to wait on him hand and foot). By dispelling these widely-circulated untruths, I hope I’ve helped you ascend the ladder of grilling enlightenment.
SALT-CRUSTED T-BONES
Source: Steven Raichlen
Method: Direct grilling
Serves: 4 generously
4 T-bone steaks, each about 12 ounces and cut 1-1/4 inches thick
2 cups rock salt or very coarse sea salt
Set up your grill for direct grilling and preheat to medium-high. Brush and oil the grill grate.
Arrange the steaks on the grate and sprinkle the top with a 1/4-inch layer of salt. Grill the steak until the bottom is darkly browned and beads of blood start to form on the top, about 5 minutes.
Turn the steak over (some of the salt will fall into the fire—it’s supposed to). Sprinkle another 1/4-inch layer salt on top of the steak. Continue grilling until the bottom is again darkly browned and the steak is cooked to taste—4 to 5 minutes more.
Turn the steak on its side with tongs and whack it with the back of a knife to knock off the excess salt.
To serve, transfer it to a cutting board and let it rest for 2 minutes. Cut the meat off the bone. (Return the bone to the fire to char it, then serve it separately.) Cut the now boneless steak crosswise and slightly on the diagonal into 1/2-inch thick
strips. Serve with a well-aged Rioj a and get ready for some of the best steak you’ve ever tasted.
T-BONES WITH WALNUT-ROQUEFORT BUTTER
Source: Adapted from How to Grill by Steven Raichlen (Workman, 2001)
Method: Direct grilling
Serves: 4 generously
Advance preparation: 1 to 2 hours for chilling the butter
4 T-bone steaks, each about 12 ounces and cut 1-1/4 inches thick
Coarse salt (kosher or sea)
Coarsely ground black pepper
Walnut-Roquefort Butter for serving (see recipe below)
Set up your grill for direct grilling and preheat to medium-high. Brush and oil the grill grate.
Sprinkle the steaks on both sides with the salt and pepper.
Arrange the steaks on the hot grate at a 45-degree angle to the bars of the grate. Grill for 4 to 6 minutes per side for medium-rare (about 145 degrees F on an instant-read meat thermometer), rotating the steaks after 3 minutes to create an attractive crosshatch of grill marks. Transfer the st eaks to plates or a platter and top each with a pat of Walnut-Roquefort Butter.
WALNUT-ROQUEFORT BUTTER
Makes about 2/3 cup
8 tablespoons (1 stick) salted butter, at room temperature
2 ounces Roquefort cheese, crumbled
1/4 cup toasted walnuts, chopped
2 tablespoons finely chopped flat-leaf parsley
Sea salt and freshly ground black pepper to taste
Place the butter, cheese, walnuts, parsley, and salt and pepper in a small mixing bowl and beat with a wooden spoon until light and fluffy.
Lay a 12-inch square piece of plastic wrap, waxed paper, or parchment paper on your work surface and mound the flavored butter in the center. Roll it up into a cylinder, twisting the ends to compact the butter. Chill until firm. The flavored butter will keep for up to 5 days in the refrigerator or up to 3 months in the freezer. To use, unwrap the roll and cut crosswise into 1/2-inch slices.
Yours in righteous grilling,
Steven Raichlen, Grill Master and Editor-in-Chief
Nancy Loseke, Features Editor
![]()
UP IN SMOKE:
SPECIAL MOTHER’S DAY EDITION
Dear Up in Smoke Subscriber:
There’s a perception in the U.S. that grilling is the domain of men—that a Y chromosome is a prerequisite for playing around with fire.
Well, guys, I’ve got news for you: According to a Propane Education & Research Council (PERC) survey, more women than ever before are involved in the grilling process—from purchasing food and hardware to firing up the grill. In fact, more than 34 million women report using a grill “a couple of times a week” during grilling season last year, and another 3.4 million claim to grill “every day.”

Of course, if you travel the world barbecue trail as much as I do, this won’t come as much of a shock. In many parts of the world, women at the grill are the norm, even the majority—not the exception. While researching my next book, “Planet Barbecue,” I’ve encountered many formidable grill mistresses.
There’s Azlinah Kudar, the headscarf-wearing owner of the famous grilled fish restaurant Gerai 11 & 12 in Melaka, Malaysia. And Milica Perunovic, the Montenegran-born chef-owner of the popular restaurant Chubura in Belgrade—lightning-fast and laser-focused, she makes multi-tasking at the grill look like child’s play. And how could I forget the shy woman I met at a grill stall in Oaxaca, Mexico—she would only give me her first name, Laura—who taught me how to make the Cecina Adobada (Chile-Marinated Pork) in The Barbecue! Bible.
Closer to home there are the ’Que Queens—Karen Adler and Judith Fertig—whose popular books like The BBQ Queens’ Big Book of Barbecue (Harvard Common Press, 2005) give the female perspective on the venerable arts of smoking and grilling. Another wave-making grill mistress is Elizabeth Karmel, author of Taming the Flame (Wiley, 2005) and the creative force behind Hill Country, the excellent Texas-style barbecue restaurant in New York City.
So with so many remarkable women grill masters, how did barbecue come to be considered a “guy” thing? Anthropologists point to traditional hunter-gatherer societies, where men took on the roll of procurers of animal protein, which they butchered and roasted on impromptu campfires.  Women gathered roots, fruits, and starchy tubers, which were better suited to boiling, stewing, or slow-roasting in the ashes.
Of course, it may be that women just have more common sense than their male counterparts. “Why stand outside in the sun (or rain) downwind of a hot, smoky barbecue grill, when I can get my husband to do it?” one lady friend observed wryly.
Even when women aren’t grilling, their presence is felt everywhere.
“Here’s how it works at our house,” explains my wife, Barbara. “I pick the date, plan the party, invite the guests, do the shopping, make the marinades, set the table, and orchestrate the serving and clean-up. Steven spends 20 minutes sticking the food over the fire and they call him America’s ‘grill master’.”
Incidentally, reservations for Barbecue University at the Broadmoor in Colorado Springs, Colorado, would make a spectacular Mother’s Day gift! BBQ U
is a great bonding experience for mothers and daughters, mothers and sons, or husbands and wives. For details, go to http://www.barbecuebible.com/bbqu/.
Well, regardless of who usually wields the tongs in your family, Sunday is Mother’s Day, a perfect time to show the moms in your life your boundless appreciation for all they do—namely by grilling a Mother’s Day feast just for them. By ‘feast,’ we don’t necessarily mean brats and beer, guys. Here’s a brunch menu designed by Up in Smoke Features Editor and a mom herself, Nancy Loseke. Hey, besides thanking the most important woman in your life, you get an excuse to fire up the grill before noon.
MOTHER’S DAY BRUNCH MENU
Bloody Mary Bar*
Pineapple Rumaki*
Grilled Vegetable Strata*
Grilled Sausage
Peaches ’n Cream On the Grill*
*Recipes or instructions below.
BLOODY MARY BAR
Bloody Marys are, of course, a brunch drink classic. We like to set up a bloody mary “bar” where everyone can custom mix his or her own to taste. (Also great for tailgate parties.)
Here’s how you do it:
In a small shallow bowl, mix 1/3 cup kosher or rimming salt (sometimes sold as “Margarita Salt”) with 2-1/2 tablespoons of my All-Purpose Barbecue Rub or your favorite barbecue rub, and 2 teaspoons of celery salt. Place this next to a bowl of sliced lemons or limes. Guests run the cut side of a lemon or lime around the rim of a glass and then dip it in the seasoned salt. (Plastic cups or glasses won’t work here, guys, as the salt won’t stick. Sorry. Dish duty.) This will service several drinks. Multiply as needed.
Set out glasses, vodka, a pitcher of good-quality tomato juice (we like the Sacramento brand, especially when laced with a couple of judicious drops of liquid smoke), and any or all of the following:
-Worcestershire sauce
-Bottled hot sauce
-Steak sauce, such as my Ultimate Steak Sauce
-A small bowl of horseradish
-Assorted pickled vegetables such as asparagus spears, cocktail onions, olives, okra, dilled pickle spears, whole pepperoncini, caperberries, etc., and 6-inch bamboo skewers
-Celery spears
-Cherry or grape tomatoes
-Salt and pepper
-Beer (some people like this as a Bloody Mary chaser)
PINEAPPLE RUMAKI
Method: Direct grilling
Makes about 36 pieces
Source: BBQ USA
For the marinade:
1/3 cup soy sauce
1/3 cup pineapple juice
3 tablespoons brown sugar
1 tablespoon sesame or vegetable oil
1 tablespoon rice vinegar
1 inch fresh ginger, finely grated
1 ripe pineapple, peeled and cored
12 strips bacon, cut crosswise into thirds
36 small sprigs of cilantro (optional)
You’ll also need: 36 toothpicks or small bamboo skewers (6 inch);
1. Make the marinade. Combine the soy sauce, pineapple juice, brown sugar, oil, vinegar, and ginger in a bowl and whisk to mix.
2. Cut the pineapple widthwise into 1-inch slices. Cut each slice into 6 wedges to make 1-inch chunks. Stir the pineapple into the marinade and marinate for 1 hour.
3. Drain the marinade off the pineapple and strain into a heavy saucepan. Boil the mixture until syrupy, 5 minutes. Set this mixture aside: you’ll use it as a glaze.
4. Meanwhile, wrap each pineapple chunk in bacon, placing a sprig of cilantro (if using) between them. Secure with a toothpick or skewer. The recipe can be prepared several hours ahead to this stage.
5. Set up your grill for direct grilling and preheat to high. If grilling the pineapple on bamboo skewers, fold a 12 by 18 inch sheet of aluminum foil over three times to make a shield to protect the skewers.
6. Brush and oil the grill grate. Arrange the pineapple pieces on the grate and grill until the bacon is crisp, about 2 minutes per side, basting with the glaze. (If flare-ups occur, move the pineapple to a cooler section of the grill.) If grilling the pineapple on skewers, place the foil under the exposed part of the skewers to keep them from burning. Arrange the pineapple on plates or a platter (or serve directly off the grill). Drizzle any remaining glaze over the fruit before serving.
GRILLED VEGETABLE, SAUSAGE, AND EGG STRATA
Source: Recipe courtesy of Steven Raichlen
Method: Indirect grilling
Serves: 8
Advance preparation: 8 hours to overnight
4 to 5 cups vegetables (such as asparagus, mushrooms,
peppers, onions, etc.), grilled at a previous grill session and cut into bite-
size pieces
10 to 12 slices of rustic bread, crusts trimmed
8 small breakfast sausages, grilled at a previous grill session and
sliced into20coins
8 large eggs
1 cup milk
2 tablespoons Dijon mustard
3 tablespoons chopped chives
Several drops of your favorite hot sauce
Salt and freshly ground black pepper
6 ounces of grated Colby or Jack cheese
Butter for greasing the pan
You’ll also need:
2 disposable aluminum foil pans, 9×13-inch
Bamboo skewers
1. In a large bowl, whisk the eggs, milk, mustard, chives, hot sauce, and salt and pepper.
2. Nest the two pans (this is for strength), and grease the top one with butter.
3. Spread half of the bread cubes on the bottom of the greased pan. Top with half the vegetables, sausage, and cheese. Repeat. Pour the egg mixture evenly over the top. Cover the strata and refrigerate overnight.
4. The next day, remove the strata from the refrigerator and bring to room temperature. Set up the grill for indirect grilling and preheat to medium (about 350 to 375 degrees). Uncover the strata, and place on the grill grate away from the coals or in the unlit portion of the grill. Cover the grill. Cook the strata until it is firm in the center and golden brown on top, about 45 minutes to an hour. Let rest for 10 minutes before cutting into squares and serving.
PEACHES ‘N CREAM ON THE GRILL
Method: direct grilling
Serves 4
Source: Beer-Can Chicken
For the cinnamon-whipped cream:
1 cup heavy or whipping cream
3 tablespoons confectioner’s sugar
1/2 teaspoon ground cinnamon
1 tablespoon light rum
4 large ripe freestone peaches
3 tablespoons melted butter
3 tablespoons granulated sugar
fresh mint leaves for garnish
1. Prepare the whipped cream. Place cream in the chilled bowl of a stand mixer or in a metal bowl over ice. Beat to soft peaks, 5 to 7 minutes. Add the confectioners sugar, cinnamon, and rum and continue beating until the cream is stiff, 1 to 2 minutes more. Keep the cream chilled until serving.
2. Set up your grill for direct grilling and preheat to high.
3. If using regular peaches, cut each in half around its circumference to the seed, starting at the stem end. Twist the halves in opposite directions to separate them. Using a spoon, pry the stone out of the half that it’s lodged in. If using doughnut peaches, remove the stems.
4. Brush each peach half (or whole doughnut peach) with melted butter and sprinkle with sugar. Brush and oil the grill grate. Arrange the peaches on the grill cut side down (simply on the grill if using a doughnut peach). Grill until golden brown on both sides, 2 to 4 minutes per side. Transfer the peaches to a platter or plates, cut side up, and place a dollop of whipped cream on top. Garnish each peach half with a mint leaf. Serve any remaining whipped cream on the side.
Yours in righteous grilling,
Steven Raichlen, Grill Master and Editor-in-Chief
Nancy Loseke, Features Editor
![]() UP IN SMOKE SPECIAL EDITION:
UP IN SMOKE SPECIAL EDITION:
HAPPY ST. PATRICK’S DAY The feast day of St. Patrick, the legendary fifth century English missionary to Ireland, has become a convenient excuse for Americans to party. No matter if they are of Irish descent or subscribe to the privations of Lent: Come March 17, it’s time to break out the brogue, the beer, and the beef—corned beef, that is.
So how did beef brisket—a chewy cut with strong ties to German transplants to Texas and Jewish immigrants, and with virtually no popularity in Ireland—come to be the iconic food of the American version of St. Paddy’s Day?
Here’s the answer: Irish immigrants to New York’s Lower East Side in the 1800s, unable to afford bacon and cabbage (the traditional St. Patrick’s Day meal in their homeland), substituted the beef brisket so popular with their equally poor Jewish neighbors. But the Irish made it their own by brining it with salt—the term “corn” refers to the large particles of salt used—and other spices, and boiling it, usually with cabbage.
Well, this knowledge prompted me to rewrite my mantra: “If something tastes good baked, fried, or sautéed, it probably tastes better grilled.” I figured something that tastes good boiled—as corned beef usually is—would also taste better grilled. (or more precisely smoked) Note to self: Add the word “boiled” to mantra. So I road-tested the theory last week by smoke-roasting corned beef brisket on the grill.
The challenge with any brisket, of course, is to cook it long enough to make it tender, without drying it out. The solution in this case is to cook it in an aluminum foil pan (to shield the meat on the bottom from the heat), draping the top of the corned beef with bacon, so the melting fat bastes the meat.
I think you’ll agree that the wood smoke adds a whole new dimension and depth of flavor to corned beef, while the low-slow smoking makes the meat tender enough to cut with the side of a fork.
Not incidentally, the leftovers—not that there were many—were turned into a soul-satisfying hash for a crew lunch the next day by by our fearless Nancy who was in Miami to test recipes for my next book, “Planet Barbecue. (Her cryptic recipe for hash is below.)
Barbecue for St. Patrick’s Day? Hey, it works for me.
BARBECUED CORNED BEEF
You can stay true to the Irish-American and barbecue themes by preparing Barbecued Cabbage as a side dish (the recipe is below), or smoke-roasted potatoes.
Recipe courtesy of Steven Raichlen
Method: Smoking
Serves: 6
1 4-pound corned beef, drained and scraped of excess whole spices
6 strips of bacon
Mustard and rye bread for serving (optional)
You’ll also need: aluminum foil drip pan, 6 cups hickory, oak, or other hardwood chips, soaked in water for 1 hour, then drained
1) Place the corned beef fat side up in an aluminum foil pan. Drape the bacon strips over the top of the corned beef.
2) If using a smoker, light it according to the manufacturer’s instructions and preheat to 250 degrees F. Toss 1-1/2 cups wood chips on the coals.
3) If using a charcoal grill, set it up for indirect grilling using only half as much charcoal as you usually would (the equivalent of 6 to 8 nice lumps of charcoal per side). Toss 1-1/2 cups wood chips on the coals.
4) Smoke the corned beef until very tender, 5 to 6 hours or as needed, replenishing the coals every hour and replenishing the wood chips every hour for the first 4 hours. Try to maintain an even temperature of 250 degrees F.
5) Transfer the corned beef to a cutting board and let rest for 10 minutes, loosely tented with foil. Thinly slice the corned across the grain and serve with mustard and rye bread, if desired.
Note from Nancy: If you want to turn the corned beef leftovers into hash, boil a couple of decent-sized potatoes until tender, then peel and dice. Chop up the leftover corned beef until you have at least half as much as the potatoes—more if desired. Combine in a mixing bowl. Dice a small onion and a clove of garlic and sauté them in oil in a well-seasoned cast iron skillet over low heat until translucent. Add to the potatoes and corned beef. Toss the mixture with a bit of dry mustard (a half-teaspoon, or more to taste), a splash or two of Worcestershire sauce, salt and pepper, a bit of minced fresh parsley, and enough heavy cream to moisten the mixture. Pack into your well-seasoned and oiled cast iron skillet. Transfer the skillet to a preheated 350 degree F oven and bake for about 30 minutes, or until the bottom of the hash is attractively browned and crusty. Top with a fried or poached egg, if desired.
BARBECUED CABBAGE
Source: How to Grill by Steven Raichlen (Workman, 2001), pg. 360
Method: Indirect Grilling
Serves 6 to 8
4 tablespoons (1/2 stick) butter
4 slices bacon, cut crosswise into 1/4-inch slivers
1 small onion, finely diced
1 medium green cabbage (about 2 pounds)
1/4 cup of your favorite barbecue sauce
Coarse salt and black pepper
You’ll also need: 2 cups wood chips, soaked in cold water to cover, then drained. Best of Barbecue Grill Ring (optional) or aluminum foil, crumpled into a 3-inch ring
1) Melt 1 tablespoon of the butter in a skillet over medium heat. Add the bacon and onion and cook until just beginning to brown, 3 to 5 minutes. Drain the bacon and onion in a strainer over a bowl and reserve the drippings.
2) Core the cabbage by angling your knife about 3 inches down toward the center and cut in a circle that is about 3 inches in diameter. The piece removed should look like a cone. Discard this piece. Dice the remaining butter. Stir the barbecue sauce into the butter/bacon mixture. Prop the cabbage upright on the grill ring or aluminum foil, cavity facing up. Place the bacon and onion mixture in the cavity and top with the diced butter. Using a basting brush, paint the outside of the cabbage with bacon drippings. Season the cabbage with salt and pepper.
3) Set up the grill for indirect grilling and preheat to medium. If using a gas grill, place all the wood chips in the smoker box or in a smoker pouch and preheat on high until you see smoke, then reduce the heat to medium.
4) When ready to cook, place the cabbage on its ring in the center of the hot grate away from the heat. If using a charcoal grill, toss all the wood chips on the coals. Cover the grill.
5) Grill the cabbage until very tender (when done, it will be easy to pierce with a skewer), 1 to 1-1/2 hours. If using a charcoal grill, you’ll need to add 12 fresh coals per side after 1 hour if the cabbage is not done. To serve, peel off any dried-out or charred outside leaves and discard. Cut the cabbage into wedges and serve.
Again, Happy St. Patrick’s Day.
Yours in righteous grilling,
Steven Raichlen, Grill Master and Editor-in-Chief
Nancy Loseke, Features Editor
![]() UP IN SMOKE SPECIAL EDITION:
UP IN SMOKE SPECIAL EDITION:
SUPER BOWL, XLIIIOn Sunday, February 1, the current Titans of the NFL—the Arizona Cardinals and the Pittsburgh Steelers—will clash on a modern-day Mount Olympus (in this case, Tampa Bay, Florida) for the forty-third time. An astounding 100-million Americans will be glued to the event. Chances are good some of these people will be watching from your living or family room, collectively rooting for an exciting game, an entertaining half-time show, chuckle-inducing commercials, and above all—great food.
Personally, who wins or loses matters less to me than who eats well: The only Titan I truly care about is Prometheus, who according to Greek mythology, gave man the gift of fire. And I know he would be disappointed if your Game Day menu consisted of nothing but chips and pretzels—not when there are so many terrific grilling and barbecuing options.
Make Prometheus (and me) proud.
Below are recipes you’ll want to add to your Super Bowl Sunday repertoire. We’ll assume, like all good winter warriors, you’ve been grilling all year, but if your grill happens to be buried under 12 inches of snow or outside temperatures are low enough to freeze your beer, it’s a good time to pull out Steven’s book, Raichlen’s Indoor Grilling with more than 270 grilling recipes created for indoors. The following recipes work well on indoor contact grills, grill pans, stove-top smokers, rotisseries, or even fireplaces. Kitchen not in line of sight of the 46-inch plasma screen? Now that’s a problem.
May your team win.
RAICHLEN’S RULES FOR WINTER GRILLING
| 1. Position your grill in a wind-protected outside area (wind really reduces your grill’s efficiency) that is well-ventilated. Never grill in a garage, under a porch overhang, or other enclosed area. Not only is the potential for a fire great, but deadly carbon monoxide can build up. Clear any accumulation of snow off the grill.2. If grilling with gas, check all lines and connections for leaks. In cold weather, parts become brittle or cracked. Make sure the control knobs are not frozen and turn freely.
3. Once you’ve started your gas grill or built your fire, preheat the grill for at least 20 minutes.
4. Line charcoal grills with heavy duty aluminum foil, shiny side up, to help retain and reflect heat; poke holes through the foil corresponding to the bottom vents.
5. Have plenty of extra fuel on hand. When charcoal grilling, I like to have a second kettle grill for lighting and holding live coals. Or have extra chimney starters at the ready on a heat-proof surface. (Not on your wooden deck!) Add coals every half hour, or as needed.
6. Heat escapes rapidly each time the grill lid is lifted; resist the urge to “peek.” A digital temperature probe can keep you apprised of what’s going on under the lid. Some charcoal grills come equipped with a built-in thermometer—very useful in the wintertime.
7. Allow extra time. Food will take longer to cook in cold weather—anywhere from 30 to 100 per cent longer.
8. Remember, winter days are short. If lighting around the grill is dim, supplement it with a Clip-On Grill Headlight or food-illuminating Lumatongs. At the very least, have a flashlight on hand.
9. Save the slow-cooked menus for friendlier grilling conditions. Select foods that can be cooked quickly—in 30 minutes or less— over direct heat. Steaks, chops, burgers, chicken breasts, shrimp, fish steaks or filets, kebabs, etc., are all good bets.
10. In my experience, smoking is very difficult to do in cold weather as many smokers are constructed of thin-gauge metal and do not retain heat well. You can smoke in a kettle grill if you maintain temperatures of 250 to 275 degrees by periodically adding fresh coals.
11. Gas grills with double-walled construction are better at holding in heat. Kamodo-type cookers, such as the Big Green Egg are extraordinarily heat-retentive, too.
12. My assistant, Nancy, has winter camping experience, and reports people unthinkingly touch hot surfaces when they themselves are cold. Don’t let your guard down. Don’t touch your hot grill without grilling gloves or other protection. |
GRILLED BABY BACK RIBS WITH SWEET SOY GLAZE
Method: Indirect grilling
Serves: 4 to 8 as an appetizer
I encountered these sweet and crusty ribs on Bali—part of a marathon trip to research recipes for my next book, Planet Barbecue, which will be published next year. I’ve yet to meet someone who doesn’t love the sweet-soy glaze. By the way, if you’re grilling for a crowd, a rib rack will be exceedingly helpful…on Super Bowl Sunday and beyond.
2 racks of baby back pork ribs (each 2 to 2-1/2 pounds)
1 onion, quartered
2 inches ginger, peeled, cut crosswise into 1/4-inch slices, and flattened with the side of a cleaver
2 cloves garlic, peeled and flattened with the side of a cleaver
2 stalks lemongrass, trimmed and flattened with the side of a cleaver
For the glaze:
1/2 cup soy sauce
1/2 cup molasses
1/2 cup sugar
1 tablespoon minced fresh ginger
2 cloves garlic, minced
1 large shallot, minced
1/2 teaspoon black pepper
1/2 teaspoon white pepper
You’ll also need: 1-1/2 cups wood chips or chunks, soaked for 1 hour in water to cover, then drained (optional); a rib rack (optional)
1. Place a rack of ribs meat side down on a work surface. Remove the thin, papery membrane from the back of the rack by inserting a slender implement, such as a butter knife or the tip of a meat thermometer, under it. Using a dishcloth, paper towel, or pliers to gain a secure grip, peel off the membrane. Repeat with remaining rack.
2. Cut the onion, ginger, garlic, and lemongrass into 1/2-inch pieces and puree in a food processor, adding enough water (about 1/4 cup) to make a thick but spreadable paste. Place the ribs on a baking sheet and spread the spice paste over them on both sides. Cover with plastic wrap and marinate in the refrigerator for at least 4 hours or as long as overnight.
3. Make the glaze: Place the soy sauce, molasses, sugar, ginger, garlic, shallot, and pepper in a heavy saucepan. Boil over high heat until thick and syrupy, 4 to 6 minutes, stirring often. The sauce can be made several hours ahead of time.
4. Set up your grill for indirect grilling and preheat to medium. Place a large drip pan in the center of the grill under the grate.
5. When ready to cook, brush and oil the grill grate. Place the ribs bone-side down in the center of the grate over the drip pan and away from the heat. (If your grill has limited space, stand the racks of ribs upright in a rib rack.) If cooking on a charcoal grill and wood smoke is desired, toss half the wood chips on each mound of coals. Cover the grill and cook the ribs until tender, 1-1/4 to 1-1/2 hours, applying the glaze halfway through the cooking time. When the ribs are done, they’ll be handsomely browned and the meat will have shrunk back from the ends of the bones about 1/4–inch.
6. Replenish the coals as needed. Reglaze the ribs a few minutes before serving; cook until the sauce is sizzling, 1 to 3 minutes per side.
7. Transfer the ribs to a large platter or cutting board. Let the ribs rest for a few minutes, then cut the racks into individual ribs. Serve any remaining glaze, warmed, on the side.
BRACIOLE(SICILIAN-STYLE STUFFED BEEF ROLLS)
I first discovered braciole at a butcher shop on Boston’s North End when I was the restaurant critic for Boston Magazine. Though well-known to almost anyone of Italian extraction, braciole (pronounced “bra-zohl”) was a revelation to me. Think of it as a hoagie wrapped in a steak. Great served hot or cold.
Source: Adapted from Indoor Grilling by Steven Raichlen (Workman, 2004)
Method: Direct grilling
Serves: 8 to 10 as an appetizer
1-1/2 to 2 pounds very thinly sliced (1/4-inch) round steak (some supermarkets sell meat labeled “braciole”; otherwise, ask your butcher to do this)
Coarse salt (kosher or sea) and freshly ground black pepper
1 tablespoon dried oregano
6 ounces thinly sliced Provolone cheese
2 ounces thinly sliced prosciutto or ham
2 ounces thinly sliced Italian salami
2 ounces thinly sliced pepperoni
1/2 cup Italian pickled hot peppers (optional), drained and finely chopped
You’ll also need: Butcher’s string, cut into 6-inch lengths
1. Cut the meat into rectangles approximately 4 inches by 5 inches. (Avoid any sinewy spots.) Arrange on the work surface. Season each piece on both sides with salt, pepper, and oregano.
2. On each piece of meat, arrange the slices of Provolone, prosciutto, salami, pepperoni, and the pickled hot peppers, if using, leaving the top inch of the piece of meat bare. Roll each piece of meat up tightly, starting opposite the bare side, and secure each meat roll by tying crosswise with two pieces of butcher’s string. (Trim any loose ends of string.) The braciole can be prepared to this stage several hours ahead and refrigerated, covered.
3.When ready to cook, set up your grill for direct grilling and preheat to medium-high. Brush and oil the grill grate.
4. Cook the braciole until crusty and brown on the outside and cooked through, 2 to 3 minutes per side. Transfer to a cutting board and let rest a few minutes. Remove and discard the strings. Serve the braciole whole, or (best) cut each crosswise on a sharp diagonal into 1/2–inch thick slices. Arrange attractively on a platter.
Yours in righteous grilling,
Steven Raichlen, Grill Master and Editor-in-Chief
Nancy Loseke, Features Editor
![]() UP IN SMOKE
UP IN SMOKE
HOLIDAY GIFT GUIDE
FOR BARBECUERS AND GRILLERS
Dear Up in Smoke Subscriber,
Thanksgiving may be receding in the rearview mirror, but the rest of the holiday season is gaining on us faster than a Tesla Roadster (the high-performance electric sports car).
So take a deep breath: In the coming days, not only must you come up with inspired gift ideas for the people on your “A” list, but in all likelihood, well-intentioned relatives and friends will be asking you what’s on your wish list. (Besides the Tesla.)
This year, of course, Americans’ purchasing decisions will be heavily influenced by the weakened U.S. economy. It’s been predicted that consumers will not only be spending less during the holiday season than they have in the past, but they’ll be seeking out more practical gifts–even making homemade gifts.
That’s good news for us. It’s hard to get more practical than barbecue.
As a genre, barbecuers and grillers have always been easy to please. Their needs are fairly basic: Fire, fuel, food, and friends.
With that in mind, Nancy Loseke, Features Editor of Up in Smoke, and I have compiled a holiday gift guide specifically for people who love live-fire cooking—people like us.
(Steven): I have long been a fan of Lodge Cast Iron, a Tennessee company that has been in the cookware business since 1896. I not only own several “Sportsman” hibachi-style grills—you’ve seen them on Primal Grill with Steven Raichlen—but I consider Lodge’s cast iron skillets a grilling necessity. You can cook anything from Yorkshire Pudding (see The Barbecue! Bible 10th Anniversary edition page 439) to smoked-roasted Blueberry Crumble (BBQ USA, page 715) in them. Recently, Lodge added individually portioned Mini-Servers to their line—great for entertaining at home. They come in four shapes: round, oval, rectangular, and divided rectangular.
(Nancy): Fewer hours of daylight (not to mention snow and numbing cold) can make winter grilling challenging. Believe me, I know: I live in Cleveland, and spent several wintry weeks testing recipes for Raichlen on Ribs. Weber has incorporated grill lights into its most popular gas grills, and also manufactures a solar-powered unit that clips to the side of the work table.
For external grill lights, it’s hard to best Steven’s Best of Barbecue Grill Headlight and Lumatongs®. The former clamps onto your work table and shines 10 LED bulbs under the grill hood onto your food. The latter was one of the first barbecue tools Steven ever designed. Lumatongs® feature spring-loaded tongs (the longest on the market) with twin halogen lamps built into one arm to illuminate whatever you’re cooking. Talk about a great gift for your favorite grill lover!
There’s nothing more disappointing than running out of gas in the middle of a grilling session. GasWatch™ manufactures a UL-approved, easy-to-read gas level indicator for 20-pound tanks. Additional features include a built-in leak detector and an emergency flow limiter (in the event of a major leak).

(Nancy): If you watch our shows, you know we’re always beating the drum for “killer” grill marks. The easiest way to achieve them is to grill on cast iron grates—available on some, but not all grills. Enter our cast iron Tuscan Grill, which you lay directly on top of your stainless or porcelain grate. Preheat until it’s screamin’ hot, brush with oil, then grill. You’ll get grill marks worthy of a pro.
And since it’s December, we might point out that the 14- by 14-inch Tuscan Grill, which comes with attachable legs, was originally designed for use in your fireplace. Perfect when the weather outside is frightful or the power’s off. Or when you want to infuse your food with the primal scent of wood smoke. Priced well below comparable models.
(Steven): Based on our mail, it appears one of grillers’ biggest insecurities is knowing how to determine doneness. An instant-read thermometer is your best ally, and one of the finest on the market is the Thermapen™. This device digitally calculates temperature in as little as 4 seconds, and has a range of -58˚ to 572˚ F. Even more appealing is a thin, needle-like probe that can infiltrate a thin piece of sole as readily as a jaw-stretching hamburger. The thin probe also minimizes juice loss. The Thermapen™ is admittedly more expensive than most instant-read thermometers, but if one beautiful, expensive steak is saved from overcooking… Well, you can do the math.
(Steven): It’s hard to improve upon the iconic Weber 22-1/2-inch kettle grill that was first sold in the 1950s and is beloved by millions of people the world over. But this accessory proves you can teach an old dog new tricks: The 2290 Rotisserie enables you to spit-roast everything from boneless prime rib to whole pineapples. And as an added bonus, the metal collar that supports the spit and heavy-duty motor is useful in its own right: It raises the lid of the grill by several inches—enough to accommodate a large turkey or a bevy of beer can chickens.
Food, we’ve read, is going to be a popular gift this year. Here are some recommendations for companies we have personally done business with:
Are you all “turkeyed out”? Seafood is a great alternative to all those heavy holiday foods, and it doesn’t get any better than Legal Sea Foods. Fresh lobster, swordfish, tuna, Alaskan crab legs, and much, much more, are only a mouse click away. All are superb when grilled. Gift certificates are also available on the company’s website.
Melissa’s, based in Los Angeles, California, is one of the country’s top purveyors of specialty produce from around the world. Their huge online store features a Grilling Basket filled with grill-worthy seasonal produce such as cipolline onions, portobello mushrooms, chayote squash, fennel, elephant garlic, Anaheim chile peppers, and other goodies. Hardware includes a perforated vegetable grilling basket and a set of four circle kebabs. Nancy has visited their facility, and pronounced it “first class”; they even have separate facilities for their organic business.

Our next idea is shamelessly self-serving, but we like it anyway because everyone wins: Give your family and friends gift certificates to the best steakhouse in town…which just happens to be at your house. Buy prime steaks from the same supplier the pros use and we use on Primal Grill, Chicago-based Allen Brothers. Consider their bone-in filets mignons, beautifully marbled center-cut rib steaks, or dry-aged bone-in ribeyes.
A “Steak Lover’s Grill Kit” will guarantee your success: an incomparable rub, steak sauce, beef smoking chips, and two button-type thermometers are included.
People who love live-fire cooking are always trying to improve their game or add new recipes to their repertoire. I have never put Nancy, who has worked for me for several years, on the spot to name her favorite book from the Barbecue Bible series. But she volunteered that she gives How to Grill to graduating seniors, newlyweds, and people who rarely venture beyond hamburgers or who really want to learn more about the art of grilling. The more adventuresome, foodwise, get BBQ USA and/or The Barbecue! Bible.

She likes to package them—along with a few goodies like Best of Barbecue rubs and sauces—in a galvanized ash can, and then runs a big ribbon from the bottom, through the handles, and over the lid. This year, everyone on her gift list will be receiving the “Primal Grill with Steven Raichlen” DVD—three commercial-free hours of the first seven episodes of the show, along with additional footage. And her brother—the one who continues to believe the last grilling session’s residue will season the next one (it will, but not in a good way)—will be getting The Ultimate Grill Brush.
Of course, homemade gifts—always appreciated, and never out of style—are a great alternative when times are tough. And even when they’re not. As you might know, Steven has been been traveling extensively throughout the world this year, doing research for the next book, “Planet Barbecue.” Below are two recipes he collected while in Africa—a chutney and a rub that would make great gifts.
SOUTH AFRICAN FIG CHUTNEY
Makes eight 1-cup jars
3 tablespoons vegetable oil
1 medium onion, peeled and diced
3 cloves garlic, minced
3 pounds ripe tomatoes, or good-quality canned tomatoes
2 pounds fresh or dried figs, stemmed and chopped (see Note)
1/2 cup red wine vinegar, or more to taste
1 bay leaf
2 teaspoons fresh thyme, or 1 teaspoon dried
1 tablespoon chopped fresh rosemary
1 cup Coca-Cola
1 cup of water
Granulated sugar to taste (optional)
1. Heat the oil in a large saucepan. Add the onion and cook over medium heat until soft and translucent, 3 minutes. Stir in the garlic and continue cooking until the vegetables are lightly browned, 1 to 2 minutes more.
2. Stir in the tomatoes, figs, vinegar, bay leaf, thyme, rosemary, Coca-Cola, and 1 cup of water. Simmer the chutney until thick and jam-like, 30 to 40 minutes, stirring often with a wooden spoon. You can start cooking the mixture at a higher heat to evaporate the excess liquid. As the mixture thickens, you’ll need to lower the heat to medium, then to low. Do not let the chutney burn.
3. The chutney should strike a nice balance between sweet and sour. Normally, the sugar in the figs and Coca-Cola is enough to sweeten the chutney, but you can always add a little granulated sugar if you feel you need it. Likewise, additional vinegar can be added for extra tartness. Remove the bay leaf and package in attractive jars.
Label, and include instructions for keeping (refrigerate) and serving (excellent with ham, pork, and poultry, especially duck, pheasant, and game hens).
PIRI PIRI RUB
For best results, be sure to use fresh spices. This rub is inspired by the fiery chicken dishes based on the piri piri chile that you find in Angola, Mozambique, and Portugal. To use, mix the Piri Piri rub with a little vegetable oil or olive oil, and slather it over chicken, lamb, or shrimp before grilling.
Makes about 1-1/2 cups
1/3 cup paprika
2 to 5 tablespoons cayenne pepper, or to taste
1/4 cup ground cumin
1/4 cup ground coriander
3 tablespoons coarse salt (kosher or sea)
2 tablespoons onion powder
2 tablespoons garlic powder
Combine all the ingredients in a small mixing bowl and whisk to mix; break up any lumps with your fingers. Package in attractive jars and give instructions for use. Will keep for about 6 months away from heat and light
From all of us—myself, Barbara, and Nancy, have a wonderful holiday season.
Yours in righteous grilling,
Steven Raichlen, Grill Master and Editor-in-Chief
Nancy Loseke, Features Editor
![]() UP IN SMOKE
UP IN SMOKE
BARBECUE UNIVERSITY:
AN INSIDER’S VIEW
Dear “Up in Smoke” Subscriber,
As far as I know, only one person has attended Barbecue University™ more times than I have: Barbara Raichlen, Steven’s wife. She was there in 2001 when Steven founded the school, and has personally watched it evolve into one of the most popular culinary vacations in the country.
Hi. I’m Nancy Loseke, Steven’s assistant and the Features Editor of Up in Smoke. If you are one of the people who has written to me asking to be notified immediately if I tire of my position, I am advising you not to hold your breath or quit your day job. I’ve got it good, and I know it.
One of the many perks of being the assistant to the world’s foremost authority on all things barbecue is nearly unlimited access to Barbecue University™, or as we call it, BBQ U. Truthfully, I don’t know how many times I’ve “repeated” the class since I joined Steven’s organization in the Spring of 2005. But I always learn something new and meet wonderful and interesting people, many of whom I’m still in touch with. There’s nothing like great food and live-fire cooking to bring people together.
We’ve just announced dates for next year’s sessions of BBQ U—only two, as Steven is working on a new book and TV show—and if you’re motivated to further your barbecue education (and cultivate potential friends for life!), you may want to get in queue now as classes fill up fast. You can read all about BBQ U™ in the October issue of the Robb Report. Newly-minted grill masters and mistresses often sign up for the next session before the ink has dried on their BBQ U-issued diplomas.
Though a serial student of Barbecue University™ myself, the 2008 session was the best so far. It was magic. I can’t wait for 2009.
Within minutes of my Friday night arrival at the Broadmoor in Colorado Springs last June, I was ensconced in a beautiful room in the historic hotel. I went to sleep with the silhouette of the Rocky Mountains outside my west-facing windows. The Broadmoor, incidentally, is an easy drive from the Denver International Airport—about 90 minutes—although you can also take a commuter flight directly to Colorado Springs.
Their first night on “campus,” incoming students are treated to a welcoming cocktail party and dinner featuring specialties from the Broadmoor’s more than dozen on-site restaurants. Most people in attendance have been looking forward to the BBQ U experience for months, and their anticipation is at its zenith. I especially enjoy hearing the stories of how people got here—how one woman tricked her husband into believing they were attending a financial conference, or how a daughter surprised her father with a trip just for the two of them.
(It goes without saying that reservations for Barbecue University™ make unforgettable holiday gifts. And the 2009 schedule conveniently abuts Father’s Day!)
 |
There were no less than two dozen grills and smokers in the “burn area” at BBQ U, 2009.
Photo courtesy of Nancy Loseke. |
I love the next morning, too, when the students breakfast on the mountain and first lay eyes on the “burn area” where the grills—some two dozen—are lined up, sexy as sports cars, the shiny stainless steel reflecting the blue skies and jaw-dropping scenery. Some people linger around the fire pit, as mornings can be cool in the Rockies. But most stake out their seats in the lecture area, jostling for front-row views. At 9 a.m. sharp, the “professor” begins sharing the knowledge he’s accumulated about the world’s barbecuing and grilling traditions.
As you can imagine, it takes a considerable amount of manpower (and womanpower, I might personally add!) to set up all the grills and organize a field kitchen for the classes. But the genial staff, led by Food and Beverage Director Craig Reed, lived up to the Broadmoor’s can-do reputation.
The lessons take a practical turn once Steven starts demonstrating the food preparation—an ambitious eight or nine recipes each day. Teams are recruited to help, and soon, everyone has moved outside where the real live-fire action takes place. Meanwhile, the Broadmoor’s Executive Chef, Austrian Siegfried Eisenberg, prepares lunch for the class using the same recipes the students make in class. En masse, the class moves back inside to plate the dishes they’ve grilled or barbecued. Competition is fierce for the most attractive presentation. Steven summarizes the day’s lessons and fields questions.
 |
Broadmoor culinary student Katharine helps Steven illustrate the finer points of brisket.
Photo courtesy of Pat Hemenway. |
Spirits are high when everyone sits down for lunch to trade grilling tricks and/or war stories, or make plans for the rest of the day. (Afternoon naps are often mentioned, but the Broadmoor offers a large menu of recreational opportunities, including golf on one of its championship golf courses, tennis, spa services, art classes, horseback riding, etc. Nearby are tourist attractions such as Garden of the Gods, the Air Force Academy, Pike’s Peak, a world-class zoo, quaint towns, and many other things.)
On Day 3 of BBQ U, students discover the test Steven’s been alluding to—an oral and written exam—is real. But to my knowledge, no one has ever flunked. Personalized diplomas validate the entire experience. And individual framed photos with Steven give attendees bragging rights when they return home.
As I said earlier, two sessions of Barbecue University™ have been scheduled for 2009: the first runs from June 11 – 14; the second takes place June 14 – 17. For reservations or more information, contact the Broadmoor: 1-800-634-7711.
Steven has already selected the recipes for Barbecue University™, 2009. It’s a sensational list, folks, that highlights dishes from Steven’s travels on Planet Barbecue, including:
–a spectacular Colombian lomo al trapo (whole beef tenderloin wrapped in a cloth with salt and roasted in the embers)
–piri piri prawns
–leg of lamb provencale
–Indian grill breads with grilled cheese kebabs
–a spectacular whole hog spit-roasted Greek Island style.
In the meantime, here are two of my favorite recipes from the 2008 session:
GRILLED ENDIVES WITH ROQUEFORT AND WALNUTS
This is a terrific salad for Fall, one I have made several times and always to great reviews. It would mesh well with a Thanksgiving menu. (Scatter with sweetened dried cranberries, if desired.)
 |
Lori puts the finishing touches on Grilled Endives with Roquefort and Walnuts at Barbecue University™, 2008.
Photo courtesy of Pat Hemenway. |
Method: Direct grilling
Serves: 4
8 Belgian endives, trimmed and halved lengthwise (See Note)
1/4 cup extra virgin olive oil
Coarse salt (kosher or sea)
Freshly ground black pepper
1/2 cup English walnuts, toasted and coarsely chopped
1/2 cup (2 to 3 ounces) crumbled blue cheese, preferably Roquefort
1/4 cup curly parsley, finely minced
Set up the grill for direct grilling and preheat to high.
Brush the endives with olive oil and generously sprinkle with salt and pepper.
Arrange the endives on the hot grate and grill until nicely browned, 3 to 5 minutes per side, turning with tongs.
Transfer the endives to a platter; arrange in two rows of eight pieces each down the length of the platter. Sprinkle the walnuts, cheese, and parsley down the center of the platter. Serve immediately.
Note: A mix of green and red endives (the latter is also called Treviso) makes an especially attractive presentation.
SPATCHCOCKED GAME HENS
COOKED UNDER A BRICK
WITH BASIL MARINADE
 |
Spatchcocked game hens pay homage to the 2008 Olympic games.
From left, Jessica, Larry, Steven, Matt, and Chris.
Photo courtesy of Pat Hemenway. |
Method: Direct grilling under a brick
Serves: 2 to 4
Advance Preparation: 2 hours for marinating the game hens
For the marinade:
1/3 cup extra-virgin olive oil
1/3 cup fresh lemon juice
1/3 cup boiling water
3 cloves garlic, peeled
1 large bunch fresh basil, stemmed
1 teaspoon salt
1 teaspoon freshly ground black pepper
4 game hens (1 to 1-1/4 pound each)*
For serving:
Fresh basil sprigs
Lemon wedges
Cherry tomatoes
You’ll also need:
4 bricks completely wrapped with heavy-duty aluminum foil
A spray bottle of water to control flare-ups
Combine the oil, lemon juice, water, garlic, basil, salt and pepper in a blender and process to a smooth paste. Refrigerate if not using immediately; it’s best the day it’s made.
For each hen, remove the packet of giblets (if any) from the body cavity and set aside for another use. Remove and discard any excess fat just inside the body cavity of the game hen; rinse the bird, inside and out, under cold running water, then drain and blot dry, inside and out, with paper towels. Place the bird, breast side down, on a cutting board.
Using poultry shears or a sharp knife, cut through the flesh and bone along both sides of the backbone. Cut from the tail end to the head end and completely remove the backbone.
Open out the bird (like opening a book) by gently pulling the halves apart. Using a sharp paring life, lightly score the top of the breastbone. Run your thumbs along and under the sides of the breastbone and attached cartilage and pop them out. Spread the bird out flat.
Turn the bird over. Using a sharp knife, make a slit in the skin between the lower end of the breastbone and the leg, on each side, approximately 1/2 inch long (you’re trying to accommodate the end of the drumstick). Stick the end of the drumstick on that side through the slit.
Put the spatchcocked hens into a nonreactive baking dish and pour the marinade over them, turning to coat completely. Cover with plastic wrap and refrigerate for at least 15 minutes, preferably for 1 hour.
Set up the grill for direct grilling and preheat to high. When ready to cook, brush and oil the grill grate. Arrange the game hens on the hot grate, all facing the same direction, at a 45 degree angle to the bars of the grate. Place a brick on top of each. Grill for 6 to 8 minutes per side; replace the bricks after turning. The bricks make it more difficult to control spontaneous flare-ups, so have a spray bottle on hand and use it judiciously if the flames threaten to burn the hens. The hens are done when an instant-read meat thermometer inserted into the thickest part of a thigh (but not reaching the bone) registers about 170 degrees F.
Transfer the hens to a platter; let rest for 3 minutes before serving. Garnish with sprigs of fresh basil, lemon wedges, and cherry tomatoes.
*Game hens are available from www.dartagnan.com if you can’t find them locally.
We hope to see you in 2009!
Yours in righteous grilling,
Steven Raichlen, Grill Master and Editor-in-Chief
Nancy Loseke, Features Editor